|
Vintage Fighter Series'
1/24
scale
Curtiss P-40C
by Mick Evans
|
 |
|
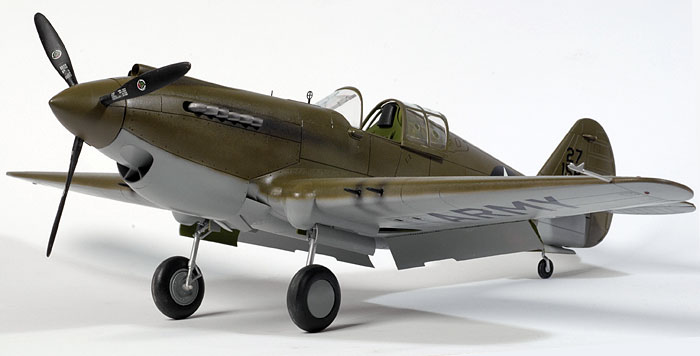
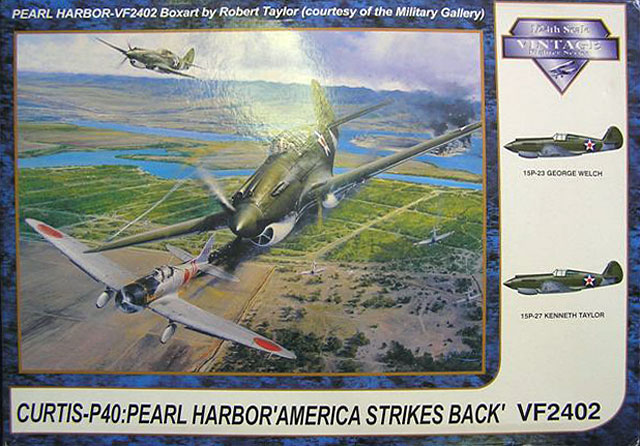
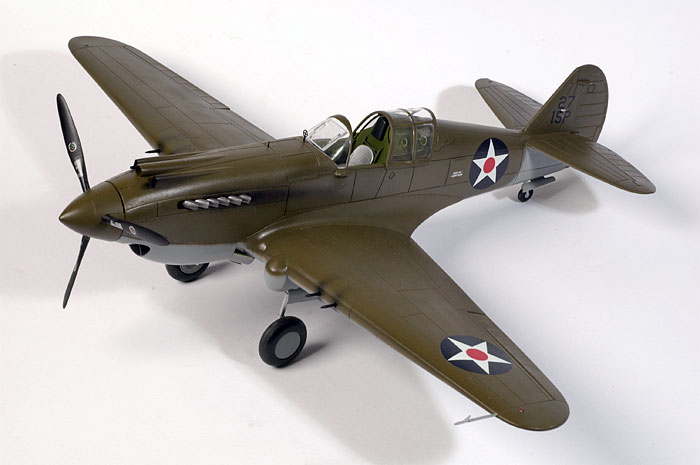
Curtiss P-40C |

Vintage
Fighter Series' 1/24 scale P-40B Tomahawk is available online
from Squadron.com
The release of the Vintage Fighter Series Curtiss
P-40C in 1/24 scale is an interesting subject for a company to produce
as their first release kit.
In-Box Review
There are 205 light grey injection moulded styrene
plastic parts and 6 clear parts included in the kit. The kit rounds up
with 7 etched metal parts and 3 soft rubber tyres. A photo image
instrument panel is included to be fitted to the rear of the instrument
panel. The kit also has a nice set of decals included depicting two
aircraft from Pearl Harbour at the time of the Japanese attack.
Click
the thumbnails below to view larger images:
[../../photogallery/photo00028711/real.htm]
The first impression is that the styrene parts are
chunky with very heavy panel lines. The wing, tailplane and rudder
trailing edges are simply too heavy and require some serious thinning.
Secondly there are a number of gimmicks causing a
compromise on detail. The undercarriage is meant to retract and
replacement clip in undercarriage doors are provided. All control
surfaces are designed to move and the engine cowl is removable allowing
visibility of the engine. All of these gimmicks compromise detail and in
1/24 scale this is one thing that you cannot compromise. The kit appears
to be very similar in parts breakdown and detail to the Trumpeter 1/32
scale P-40C, including all of the problems inherent with the Trumpeter
kit. These will be detailed during the build.
The drop tank is simply awful with large over scale
projections representing bolts. If the drop tank is to be used these
will need to be replaced.
Two pilot figures are provided. One is English
while the other is an American pilot, but the best place to put these is
in the bin. They are simply the worst moulded pilot figures that I have
seen, reminding me of some of the old 1/72 scale Frog blob shaped pilot
figures. They are featureless with the moulding not well defined and not
very crisp.
When this kit arrived for review there were two surprises inside the
justifiably large box. Both of these came from Gammett Productions. The
first is a replacement flap detail set in etched metal to replace the
woeful moveable flaps in the kit. The detail contained in this set is
nothing short of astonishing.
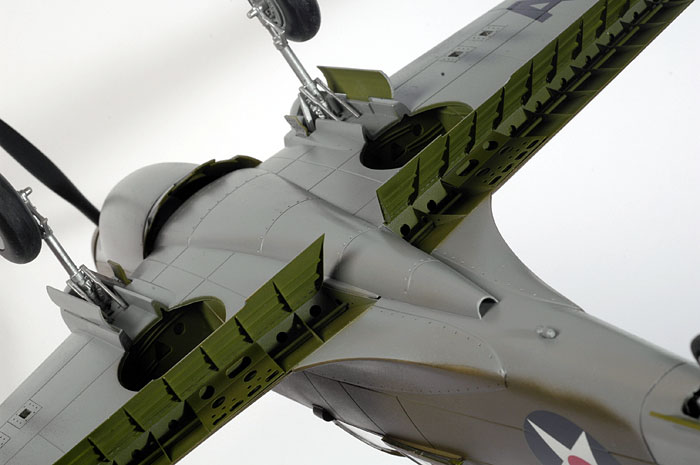
The detail set contains 52 etched metal parts to
manufacture the flap and upper wing flap bay. When complete this set is
a vast improvement over the kit flaps and flap bays. The kit parts
require some modification to remove the existing kit detail to allow for
fitment of the etched metal parts.
The second surprise was a resin engine replacement
set from Gammett Productions. This set is also a vast improvement over
the kit engine containing 10 resin parts and 12 cast metal parts.
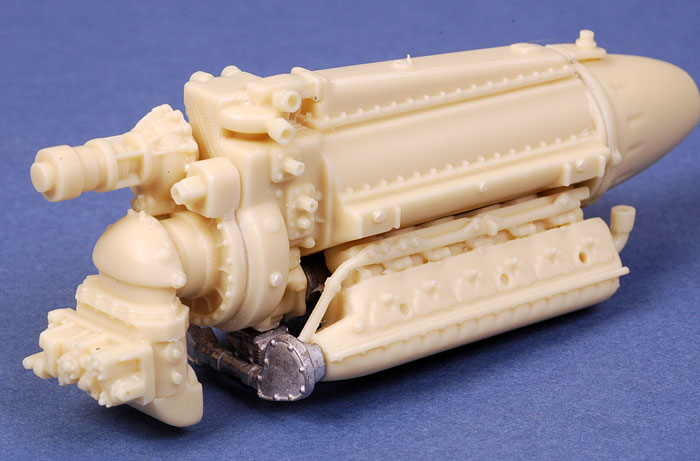
Replacement propeller blades are included in cast
metal to replace the kit propeller, which is too narrow in chord.
Early in the build I had decided to do away with
gimmicks such as retracting undercarriage and removable engine panels. I
always find that these detract from the finished model.
The kit engine and cockpit were assembled as per
the instructions. The engine is straight forward and is a mandatory fit
to hold the exhaust pipes and radiator into the correct positions. The
etched metal radiators are a nice touch. The cockpit was assembled using
the P-40 Detail and Scale Vol.1 as a reference. This is where the first
major error is discovered. The cockpit floor is simply too shallow. The
floor on the real aircraft is the upper surface of the wing, which is
the top of the wing fuel tank complete with the contents gauge attached.
The kit cockpit floor was at least 8 - 10mm too shallow. Furthermore the
floor is missing some major structure detail. The floor was
remanufactured from plastic card with the structure detail added and
then installed in the correct location. The difference in depth
perception and detail was amazing when the cockpit was fitted.
The next noticeable inaccuracy noted was the engine
cowl carburettor intake and gun tunnels. These were simply straight
sided for ease of moulding. These were reshaped correctly with a scalpel
and file and then sanded smooth reflecting the photographs in the P40
Detail and Scale. The fuselage was then assembled with no further
problems. Some attention is needed to thin down the canopy sliding rail
which is just too thick and needs to be thinned down. The chunky panels
moulded on to the fuselage were sanded off and scribed into the surface.
The wings were then prepared for assembly. First all of the moulded on
detail for the flap area is removed as per the Gammett instructions. The
trailing edge was thinned down dramatically to look more realistic
before the wings were assembled as per the instructions. The drop tank
holes were filled as I was not fitting the drop tank. Also the chunky
panels moulded on the wing surface were sanded off and scribed into the
surface. The fit of the wings to fuselage was quite good with just a
small amount of trimming required and very little filler was used.
The remainder of the assembly was pretty straight forward and the
retractable undercarriage was glued solidly down, after it was found
that the kit was a little wobbly on the moving undercarriage leg. One
final correction that was needed was the two holes needed to be drilled
in the port transparency behind the cockpit for the fuel filler access.
The Gammett flaps and flap bays were assembled as per the instructions
and these look superb when completed. The parts are an excellent fit and
locate into etched recesses. The flap bays fit snugly into the wing
areas and the flaps are then attached with an etched metal piano hinge.
The kit was painted in Xtra Colour Olive Drab and
Neutral grey before the decals were added. The decals were quite nice
but had some difficulty settling in to the deep surface detail.

The kit was subtly weathered before a coat of semi
gloss clear was sprayed.
This is not a bad first kit for a new producer on
the block. The overall fit is excellent with very little filler
required. The kit has some shortfalls but these are quite easily
overcome. Vintage Productions should drop the gimmicky retractable
undercarriage, replaceable undercarriage doors and removable panels and
focus on accuracy and detail.
In 1/24 scale where things are quite large detail is paramount. The
lessons learned in moulding this kit should be reflected in their
upcoming P-47 kit which, from the pre-production photographs that I have
seen, should be excellent.
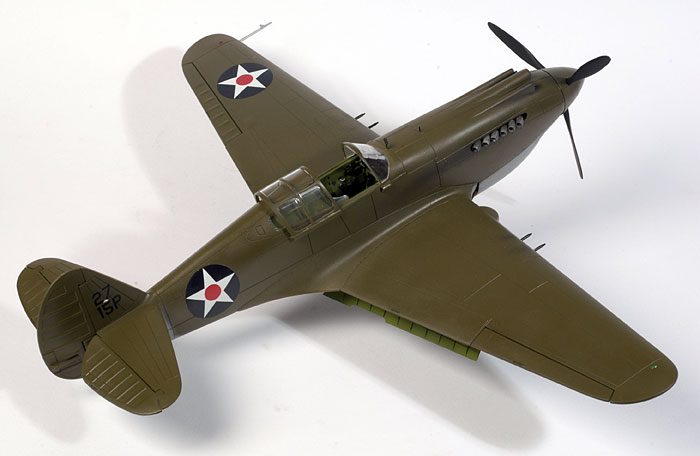
Overall, this P-40C kit is not a bad buy, but the modeller should be
prepared to do a little work. After all, it is currently the only 1/24
scale P40 on the block.
Click
the thumbnails below to view larger images:
[../../photogallery/photo00022784/real.htm]
Text and Model Copyright 2007 by
Mick Evans
Images Copyright 2007 by
Mick Evans (in-box photos) &
Brett Green
Page Created 17 June, 2007
Last Updated
24 December, 2007
Back to
HyperScale Main Page |
 Home
| What's New |
Features |
Gallery |
Reviews |
Reference |
Forum |
Home
| What's New |
Features |
Gallery |
Reviews |
Reference |
Forum |