|
Freightdog's 1/72 scale
SR P.177
Saunders Roe
Cyclone F.1
by Brett Green
|
 |
|
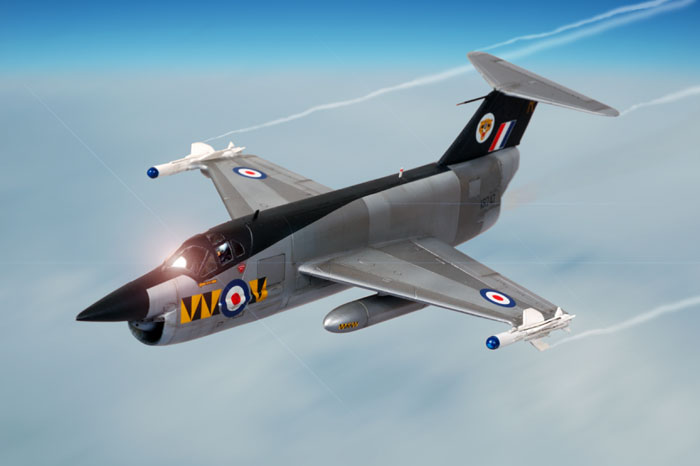
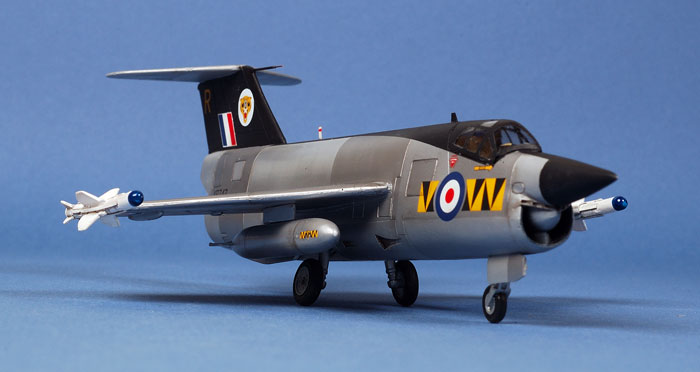
SR P.177 prototype finished as the hypothetical Saunders Roe
Cyclone F.Mk.1
74 "Tiger" Squadron, Royal Air Force
RAF Leuchars, Scotland, May 1964 |

HyperScale is proudly supported by
Squadron
Background*
In February 1952, the Cowes based Saunders-Roe company tendered to
meet specification F.124T to supply a small rocket powered interceptor,
able to fire fifty unguided projectiles at its target, then glide back
to base, or allow its pilot to escape via a jettisonable cabin, similar
to the Bachem Natter.
Saunders-Roe were awarded an amended contract on 9 May 1952 now calling
for a mixed power project. Work began on the Mach 1.3 capable SR53
high-speed research aircraft, however the SR53 would not materialize as
a combat ready design, but instead valuable experience gained by the
company could prove the concept for a larger more capable aircraft. This
project was to become the Saunders-Roe SR177.
In May 1955 the go ahead was given to meet the requirements of the Royal
Air Force under O.R.337, and the Royal Navy under N.A.47. First flight
of the Mach 2.3 SR177 was planned for early 1958; by September 1956 this
was refined to cover a batch of twenty-seven airframes, including nine
development aircraft for each service. Now designated P177R and P177N
for Air Force and Navy respectively. The first five aircraft, powered by
one Gyron Junior turbojet and supplemented by a Spectre rocket engine
were allocated serials XL905-07, 920 and 921. These five would fly
without weapon capability or radar in order to speed development.
The future of the P177R and P177N was looking bright, with potential
British orders for one hundred and fifty of each variant, along with
strong export potential from the West German armed forces. Sadly it was
not to be, the Defence White Paper of April 1957 resulted in the
immediate cancellation of the RAF P177R, reducing the initial batch to
eighteen aircraft. The Royal Navy P177N (illustrated above) survived
until December of that year, while work on the near completed prototypes
continued, by Christmas Eve the whole project was cancelled.
Saunders-Roe's last attempt to revive the project, the sale of all five
airframes under construction to Japan (including tooling and the
completed SR53’s) proved unsuccessful.
Freightdog's 1/72 scale SR P177R in the Box
 Freightdog Models released their 1/72 scale Saunders Roe P177R
mixed-power fighter project aircraft at IPMS ScaleModelworld in
November, 2006. Freightdog Models released their 1/72 scale Saunders Roe P177R
mixed-power fighter project aircraft at IPMS ScaleModelworld in
November, 2006.
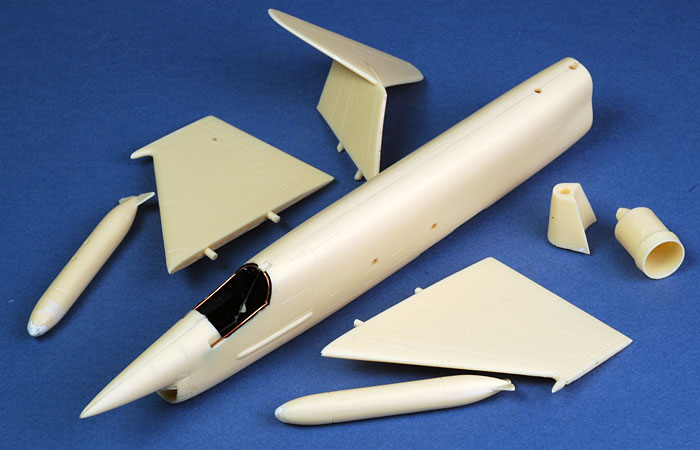
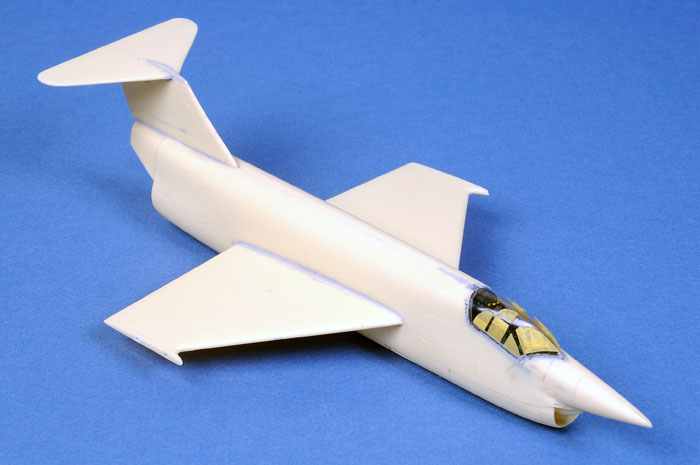
The model comprises 25 beautifully cast yellow resin parts, plus a
vacform canopy (and a spare). The high level of casting is not
surprising as the parts have been produced by Anigrand Craftworks in
Hong Kong. There were a few air bubbles that need to be filled on my
sample, but this was a fast and easy task.
Rockets and drop tanks are supplied, as is a nice ejection seat. The
seat is the only element provided for the cockpit, but it is very nicely
done and the heavy framing of the canopy will effectively disguise the
lack of detail in the black-painted front office.
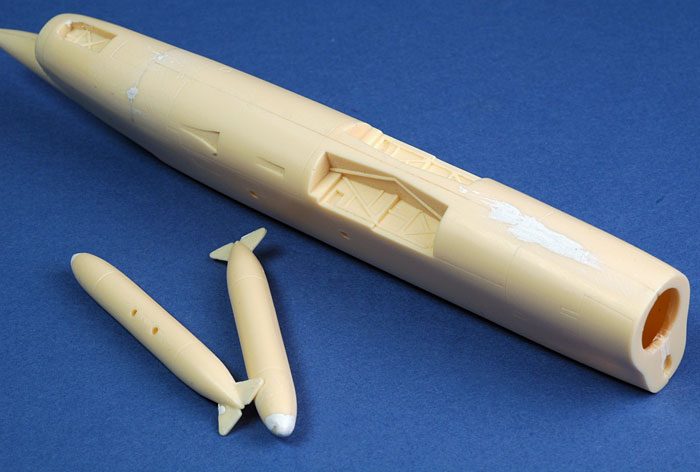
Wheel well detail is cast in place on the fuselage halves.
Very little cleanup of the resin parts is required before
construction begins.
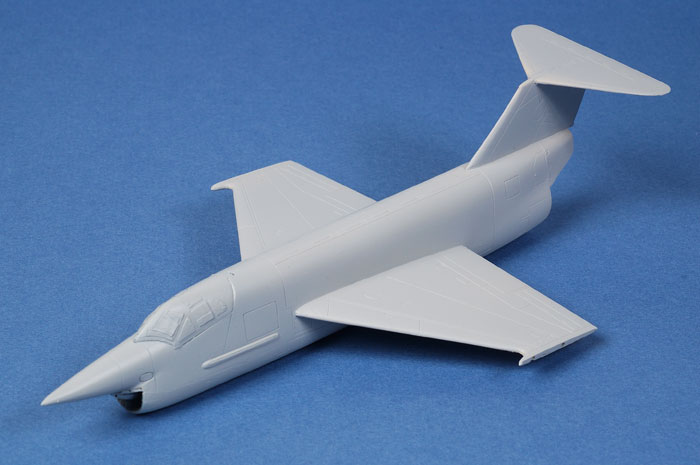
The kit is cleverly engineered to help ensure secure fit of major
parts. The fuselage has locating holes for the wings and the fin, and
the horizontal tailplanes slot into the top of the fin for a secure
bond.
Markings for six speculative aircraft are supplied, but you can
please yourself about the finish of your model as the real aircraft
never reached completion. These attractive markings will provide ample
inspiration, however. The decals are printed by Fantasy Printshop, and
are thin and in perfect register.
When I received my early production sample last year, I did not
really intend to build the model immediately. I was just going to test
fit the parts.
As it turned out, preparing the parts was so easy that I thought I might
glue a few components together. The fit was so good that I just kept going!
I only have a few comments and suggestions about
construction:
Do take a few minutes to check
for pin holes and air bubbles. On my sample, there were a few on the
fuselage and wings, and more noticeably on the drop tanks. These were filled
with Milliput and sanded smooth when set.
The Red Top Missiles are
beautifully detailed but both of mine had a nasty warp along their lengths.
I was not entirely successful eliminating this warpage, but I cut off the
raised mounting lugs and repositioned the missiles to (hopefully) draw
attention away from the banana profile.
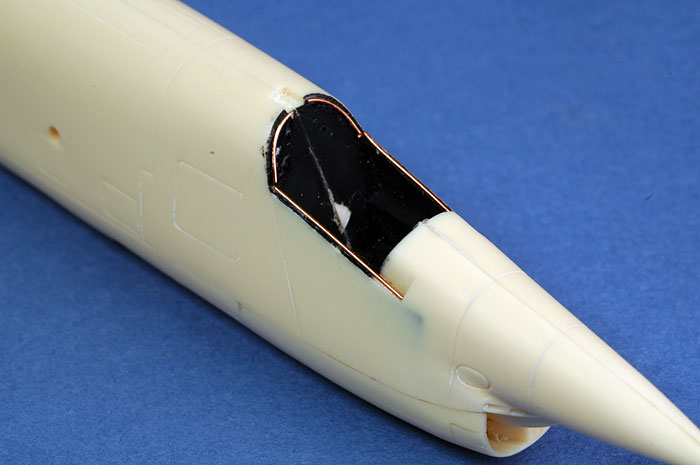
The vacform canopy is very thin.
If you are securing it in the closed position, I recommend gluing a fine
bead of copper wire (or plastic sprue, or fuse wire, or any similar
material) to act as a positive lip to glue to the inside edges of the canopy
part.
If you are building the aircraft
with the wheels down, remember that the intake lip would have been extended.
My early sample did not come with instructions so I did not discover this
detail until it was too late!
Some nose weight is required,
but thanks to the separate jet pipe I waited until construction was complete
before dealing with this issue. This is a real advantage, as I was able to
add only the weight required to keep the nose wheel on the ground, avoiding
overloading the resin undercarriage.
Otherwise, construction was very straightforward.
Fit is almost flawless. However, I did manage to slightly misalign the join on the
bottom of the rear fuselage. This step was filled with Milliput and sanded
flat when set.
Prior to painting, the main joins were brushed with
lines of Tamiya Liquid Surface Primer as insurance against any fine
gaps, and the entire model was sanded first with my Blue Mastercasters
sanding stick, then with 3600 grit Micro Mesh cloth.
The canopy was masked with Tamiya tape and secured to
the fuselage using watchmaker's cement. A number of small gaps were
filled with Tamiya Liquid Surface Primer before painting.
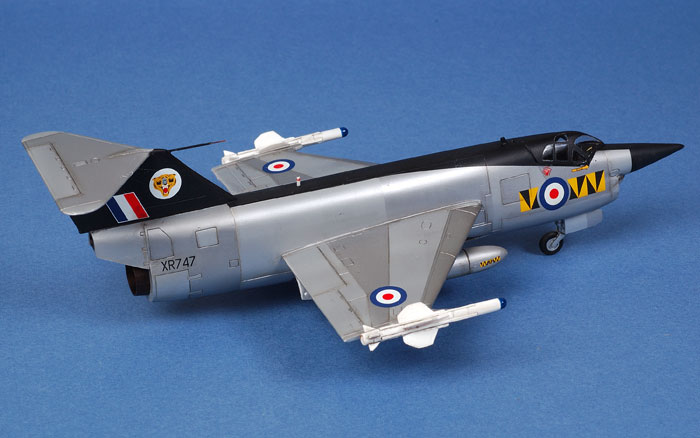
Freightdog's kit comes with six marking options, but I
decided to customise my "Cyclone" as a Tiger Squadron aircraft. I have
always liked Meteors and Lightnings in this colourful Squadron's livery,
and the lines of the P177 seemed to lend itself to something similar.
The first painting step was to spray the general canopy
area black to ensure the correct interior colour.
Because the model was destined to wear a natural metal
finish, I primed the entire airframe with Tamiya Grey Primer,
decanted from the spray can into a plastic container, and then into the
paint cup of my Testor's Aztek A470 airbrush. I like the Tamiya primer,
being fast drying and a good base for Alclad, but it can display a
slight "orange peel" finish when sprayed straight from the can.
Next, the the model was sprayed with an overall coat of
Alclad Aluminium. Selected panels were masked off before applying a coat
of Aluminium Shade 2, followed by more masking and, perhaos predictably,
Aluminium Shade 3.
Alclad dries so fast that I could mask over the previous
coat almost as soon as I had cleaned the airbrush.
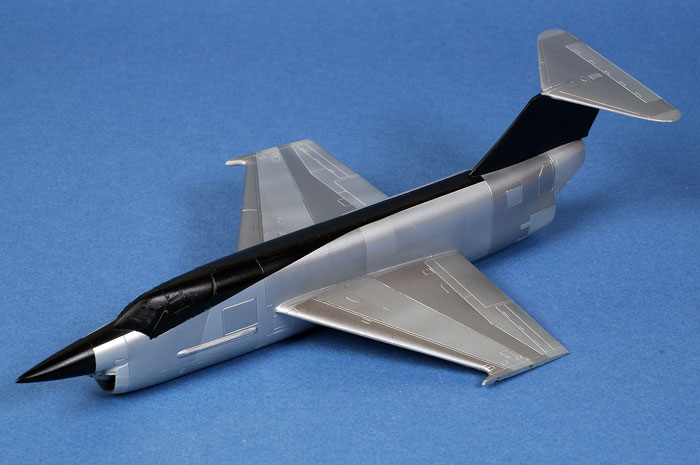
With the natural metal finish taking form, I masked the
spine, nose cone, anti-glare strip and tail. These areas received a coat
of flat black. The masking was removed from the metallic areas and the
whole model was sprayed with Polly Scale Gloss in preparation for
decals.
Markings were sourced from a number of sheets. I wanted
to depict a scheme around 1964/65, when 74 Sqn carried its most
interesting (in my opinion) colours. The truncated Squadron colours
behind the roundel was seen on Lightnings in 1965, so I thought it was
good enough for this one too.
All the Squadron flashes came from Xtradecals' 1/72
scale sheet number X72-057 for RAF Gloster Meteors. I also used the
small Squadron flash and Tiger's head from the Xtradecal sheet as a
supplementary marking for the drop tanks. The large Tiger emblem on the
tail was sourced from Cutting Edge 1/48 scale sheet CED48077 for the
English Electric Lightning. National markings, the code letter "R", the
serial number on the fuselage and under the wings, and the stencils,
were all included on the Freightdog kit decal sheet.
All the decals performed flawlessly with the help of
Micro Set and Micro Sol - even the very challenging application
over the raised strake under the port side of the canopy (after a little
persuasion with a toothpick and a hobby blade).
Weathering was kept light, with some very subtle streaks sprayed onto
the fuselage and wings, and selected panel lines highlighted with a thin
oil wash of Lamp Black and Raw Umber.
I checked my meagre references and found various schemes applied to the
missiles. In the end I settled on white, with an oil wash to highlight
the details. The tracking head was painted Gloss Blue, then a few white
spots added before an application of Tamiya Clear Blue. From some
angles, this delivers the illusion of semi-transparency.
The undercarriage was painted and installed without incident. The nose
weight was sufficient to keep all three wheels on the ground. Finishing
touches were some avionics for the spine and a pitot tube (at least I
assume it is a pitot) on the tail, all scratchbuilt.
Freightdog Models' debut release
features excellent surface detail, is easy to build, and offers
unlimited possibilities for marking options. The P177 is certainly an
interesting subject too.
I look forward to seeing what
Freightdog comes up with next!
Thanks to
Freightdog Models for the sample
kit.
* Thanks to Freightdog Models for
permission to use background text
Model,
Images & Text Copyright © 2007 by
Brett Green
except Background Text Copyright © 2007 by
Freigthdog Models
Page Created 27 January, 2007
Last Updated
24 December, 2007
Back to
HyperScale Main Page |
 Home
| What's New |
Features |
Gallery |
Reviews |
Reference |
Forum |
Home
| What's New |
Features |
Gallery |
Reviews |
Reference |
Forum |