A few weeks ago, a couple friends stopped by on a
Saturday morning to visit. We talked about the normal
modeling topics -- how many rivets we used to sand off old
Airfix kits and how many rivets we now rescribed onto
the new Hasegawa kits. When I mentioned I was having
some motivation issues on my current projects, they
suggested I build something quick, just to "clean the pipes"
and get my motivational juices flowing again.
They looked into one of my model closets and found a 1/48th
scale Tamiya Mustang III kit sitting there. With this
kit heralded as one of the finest engineered kits in the
world, they decided it was the right one for me to do a
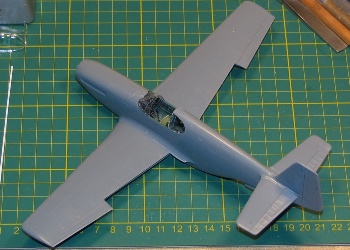
quick build. Indeed, fifteen minutes of clipping and
dry-fitting produced a complete airframe that could be
inverted and not fall apart.
This kit engineering definitely impressed me, and I
thought maybe my friends were right about the motivational
aspects, too. So, I was off -- before my friends left that
afternoon I had a completed airframe, mostly ready for
camouflage paint.
As mentioned above, this is the 1/48th
scale Tamiya RAF Mustang III kit. It is one of a
family of P-51B/C kits released from Tamiya. They all
are basically the same kit with minor variations in detail
parts. I will not go into great detail about the kit in this
posting. There have been plenty of reviews on this family of
kits. Suffice to say that after working on this kit, I am a
true believer in it possibly being one of the finest kits
ever produced (in terms of engineering and build-ability).
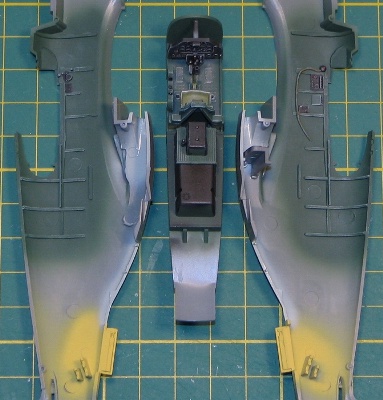
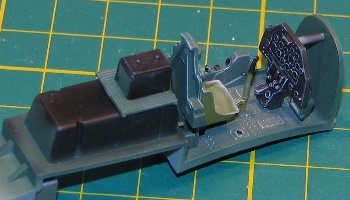
With my fiends sitting there, I broke out my air brush
and painted the interior. The overall cockpit color is Dull
Dark Green. Since I do not own any Dull Dark Green paint (by
name), I used European Green (F.S.34092). For variety, the
control stick and pilot's seat are Interior Green
(F.S.34151). I painted the instruments and assorted items in
Interior Black with a little red for specific details and
some silver dry-brushing to highlight detailing.
Five hours into the project, I had a fully painted
cockpit wrapped inside a completed airframe. I finished up
some minor details and masked the cockpit so I could move on
to the camouflage.
| |
5 Hours Work
10 Hours Work
14 Hours Work |
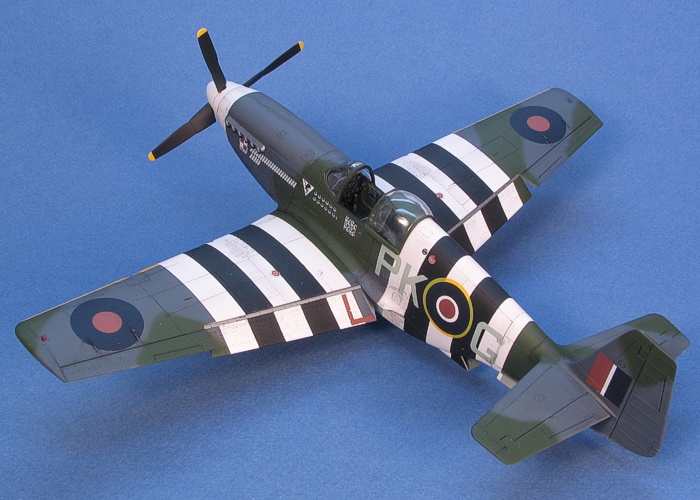
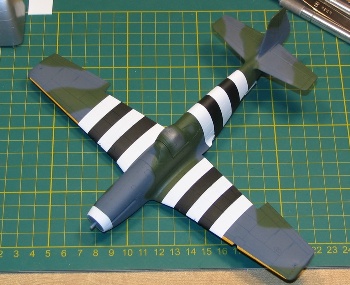
I have always liked the look of full invasion stripes on
the early Mustangs. I think it is the tall rear fuselage
sides and the contrast between the dark camouflage and the
white stripes. For simplicity sake (since I had no
after-market P-51B/C decals), I stuck with the kit markings,
but I modified the markings by applying a full set of
invasion stripes. I found pictures in various books to
support that the units represented in the kit markings were
eventually striped for D-Day. The model I built represents
one of the aircraft after it got its stripes.
 The
model is finished almost entirely in Testors Model
Master enamel paints.
The
model is finished almost entirely in Testors Model
Master enamel paints.
I started by painting the stripe areas in white (Header
Flat White). Then, I masked the white stripes and painted
the black ones (Interior Black). I also had painted the wing
leading edges in white and followed this with a coating of
yellow for the identification markings.
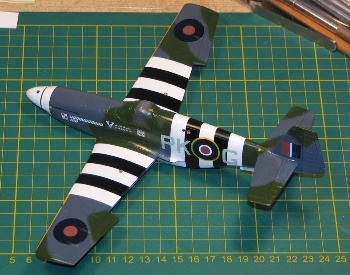
Masking off all the stripes and the yellow wing leading
edges, it was time to paint camouflage. I do not own any RAF
colors in my paint stash because I simply have never needed
them. My friends told me that there were acceptable
substitutions in the current US colors line that I could
use, so I did that. The real colors are Dark Green, Medium
Sea Gray, Ocean Gray. Respectively, I replaced these by
using Medium Green (F.S.34102), Gunship Gray (F.S.36118),
and Aircraft Gray (F.S.16473). I was pleased I did not have
to buy new paints that I would likely never use again. The
colors seemed close enough matches to the colors I was
seeing in pictures.
Following the completion of the camouflage, I unmasked
the invasion stripes and was very pleased with the look of
the stripes against the camouflage. Then, I masked the wheel
wells and painted Zinc Chromate Yellow (Humbrol
color).
Decals proved to be a more challenging thing than I would
have thought. The specific release from Tamiya that I
was building had decals printed by ScaleMaster. This
was a name I remembered from many years ago that had
excellant quality decals, so I expected these to go on with
no issues. I was wrong.
The decals had several issues. The first was that they
were reluctant to soak free of their paper backings, even
using hot water. Trying to help them to get free allowed me
to find the second issue -- the ink was very brittle and
easily broke up. I chipped pieces off several of the
markings that were nearly impossible to fix as the chips
quickly broke up into even smaller pieces. The third issue
was that these decal responded only minimally to Solv-a-Set.
Solv-a-Set was the solvent of choice on old ScaleMaster
decals, so this was a real a surprise. In the end, I did get
the major decals on the model, but I chose to ignore most
all the data markings -- they just were not worth the
hassle.
For weathering, I used my typical style of thinned down
enamel paint washes and air brush shading. I finished the
weathering with some dry brushing to pop out the surface
details. For a more complete discussion of what I do to
weather my models, see my posting on
"Weathering Aircraft".
I had painted all the detail items as I was painting the
rest of the model, so all that remained by this point was to
attach them -- the landing gear, wheel well doors, landing
light cover, and pitot. I am used to modern jets where the
"finishing touches" take alomst as long as the initial
construction and painting.
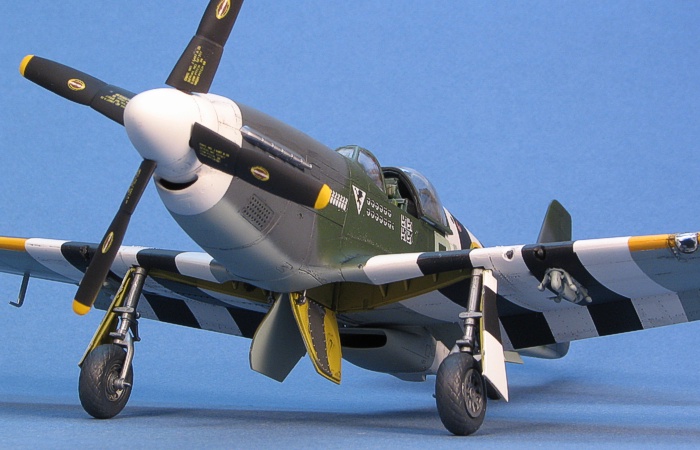
So, it was quite refreshing to have the model done only
one day after I did the flat coat and weathering.
"Clean the pipes" -- yep, it sure did. I am now finding
myself motivated to get back to my "real" projects. That is
a good thing.
I would recommend anyone feeling glum over long term
projects try building one of the "quickies". It feels very
gratifying to actually finish something.
And, the project was very quick -- 18.9 hours of work
spread over ten sittings sprinkled over two weeks. This
holds the record for the quickest model I have built (total
hours) in the last thirty years. I can now see how some
modelers complete twelve or more kits in a year if this is
the type of kit they build most often.
 Home
| What's New |
Features |
Gallery |
Reviews |
Reference |
Forum |
Home
| What's New |
Features |
Gallery |
Reviews |
Reference |
Forum |