|
Masking Tape Seat Belts
for Airplane
Models
by Rafe Morrissey

HyperScale is proudly supported by
Squadron
One detail item that can really enhance the cockpit of an aircraft
model is a nice set of seatbelts. There are a number of excellent
aftermarket options for seatbelts these days. Cutting Edge manufactures
a superb line of flexible resin seatbelts that look extremely authentic
when painted and installed. Eduard has produced very intricate
photo-etch seatbelts and buckles for years and have recently introduced
a line of pre-painted seat belts that are exquisitely detailed and look
marvelous when added to the “front office.”
So, why bother making our own seatbelts? Well there are a few reasons.
First, the aftermarket items can be a bit expensive. Prices for these
sets range anywhere from $9.99-$19.99, although most at the higher end
include other cockpit details in addition to the seatbelts. Second, if
you ever intend to enter your model in an IPMS competition, there is a
special category for out of the box that restricts you to using only
seatbelts made of tape if you wish to enter. Finally, and the prime
motivating factor for me, utilizing your own skill and creativity to
make eye-catching details is one of the prime sources of enjoyment in
modeling. Eduard’s pre-painted photo-etch belts may look really nice,
but I get a special thrill from details that I make myself. Best of all,
making authentic looking seatbelts is really easy.
Here’s how.
Other than a pencil, paint and a fine brush, the picture at left
illustrates all of the supplies you’ll need to make your seatbelts.
You’ll need a cutting surface, a straight edge, a sharp X-Acto blade and
two types of tape. Why two? Well, a big part of this technique is
fooling the eye into thinking it is seeing metal and cloth instead of
tape. Using tape with different textures helps in this bit of trickery.
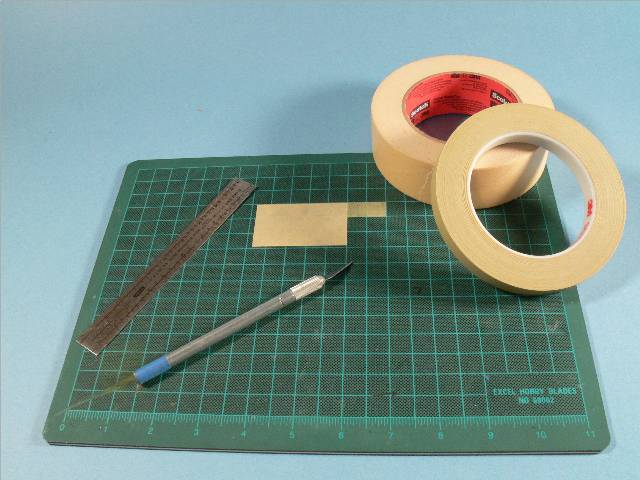
I use regular masking tape to represent the cloth belts and a smooth
tape for the buckles which will be painted silver. Metallic paint really
highlights an irregular surface so the smooth surface is important. Both
of these tape rolls are made by 3M. Michael’s and boat supply stores are
good places to find different types of tape.
The first step in making your seatbelts is to figure out what the
real ones look like! There are a number of reference books on most
airplanes and in the case of the Bf-109, enough to sink a battleship. I
used a Polish publication as my reference.
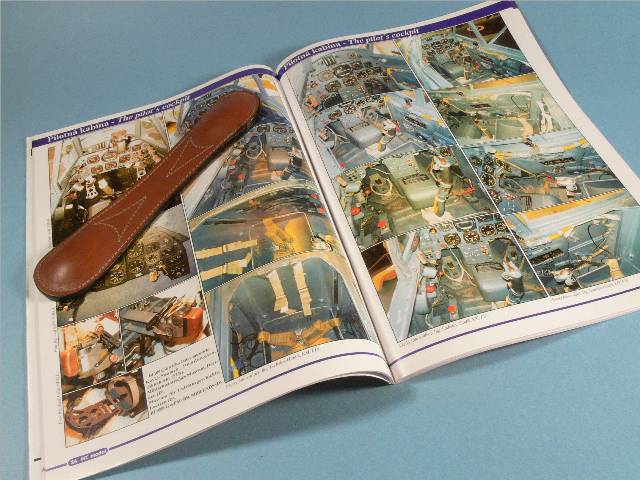
You can also find many good reference photos on the Internet.
www.aircraftresourcecenter.org is an excellent place to look
for help.
I’m not terribly scientific in my approach to laying out the
seatbelts and prefer to eyeball it from the photos. If you want to go to
the trouble you can measure the width of the seatbelt against the width
of the seat in the photograph and figure out the equivalent percentage
of the width of the kit part. Once you have your dimensions established,
begin by laying the masking tape and shiny tape side-by-side on your
cutting surface.
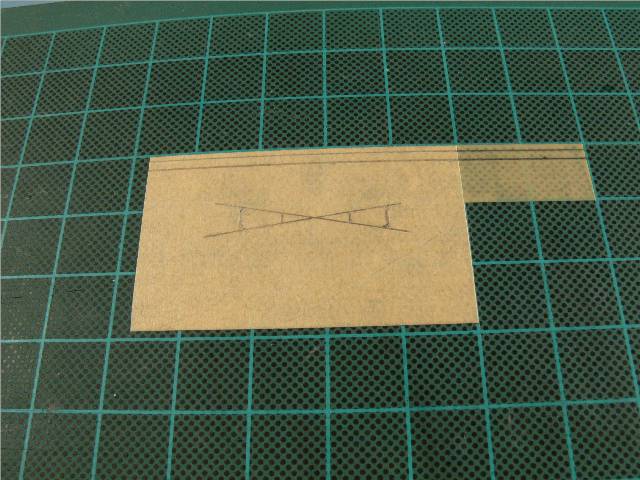
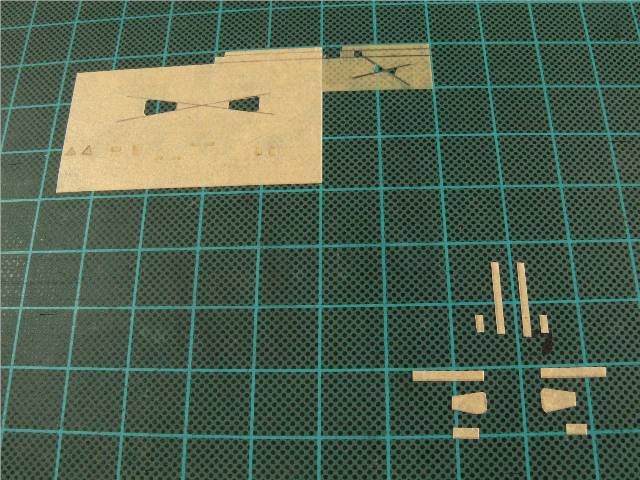
Next, mark cut lines for the shoulder straps and the lap belts.
Carrying the lines through onto the shiny tape will give you the widths
for the buckles for each type of belt. You also need to make a shallow
cross on the excess portions of both types of tape. This will give you
the rough outlines for the pads on the lap belts and the triangular
attachment fittings for the shoulder harnesses. Then make your cuts
using a straight edge and the sharp X-Acto blade.
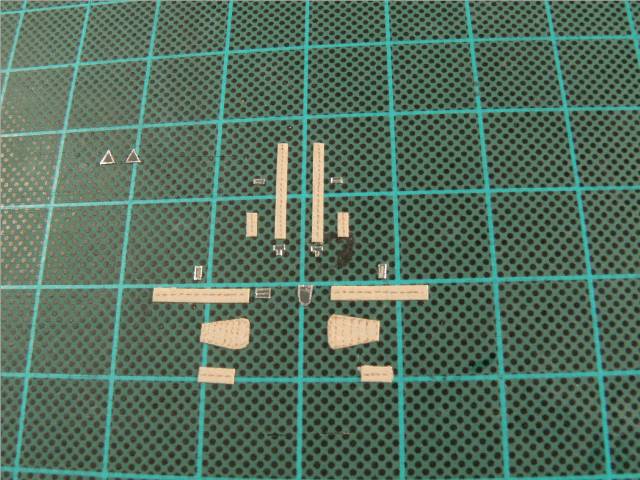
Once your cuts have been made, cut the shoulder harnesses and lap belts
to length. Also cut two pieces roughly 3/8” long to represent the
tightening straps that protrude from the adjustment buckles. Finally,
paying close attention to your references, use your sharp blade to cut
out the various buckle shapes. The widths were already established for
you when you marked your lines for the belts so it really is just a
matter of cutting to height and creating the various shapes. Place the
buckles on the excess piece of masking tape and lay out the straps so
you can see what goes where. Paint the straps a tan color.
For the buckles, you again need to think about tricking the eye. First,
paint the buckle the color of whatever surface it will be resting on
when installed in the cockpit. Items such as the attachment fittings for
the shoulder harnesses and the seat buckles therefore get painted the
color of the interior- in this case RLM 66. The adjustment buckles are a
different story. They rest on the seatbelts and have belt material
threaded through them. To simulate this, I first paint the buckle the
RLM 66 and then strike a thin band of the seatbelt color through the
middle of the buckle. The RLM 66 will simulate the shadows in the
interior of the buckle and the tan color represents the belt materiel
running through the buckle.
The next step is to use silver paint and a fine brush to paint the metal
areas of the buckle. It takes a bit of practice, but you will find it is
not too hard to paint the edges of the tape to represent the metal
buckle. Try to put the tip of your brush right next to the tape buckle
and paint fine strokes closer and closer until you get a fine line of
silver paint on the edge. Then just repeat for each side. Trust me, it
sounds more complicated than it is. Basically you use the fine brush to
paint the metal areas of the buckle over the base color. If you’re doing
this for the first time, it is probably a good idea to cut and paint a
few extras with the base color. That way if you make a mistake on one,
you can just move onto the spare.
I like to use a sharp pencil to simulate the stitching on the belts and
harnesses with little fine tick marks. A number two pencil is fine for
this but I used a dark brown Prismacolor pencil for this demonstration
because I think it produces a bit more subtle effect. Be deliberate and
try to space the tick marks evenly. If there are minor variances, it is
not too big a deal. Once the belt is posed over the seat it will be
difficult to notice them. If you want, however, you can always paint
over any mistakes and go back and correct them once the paint has dried.
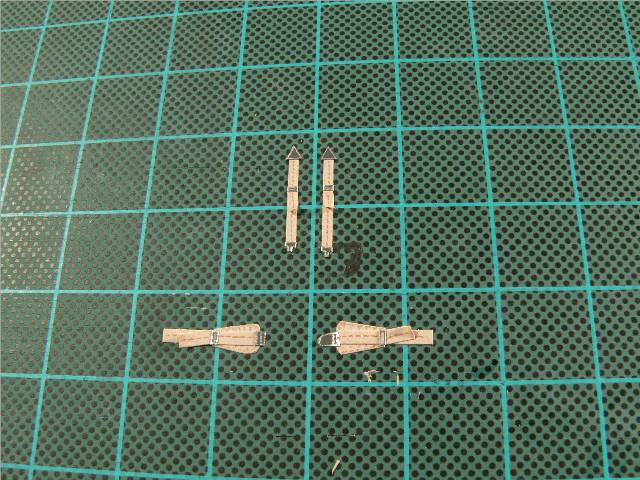
When all the paint has dried, use the tip of the knife to lift up the
buckles and arrange them next to the harnesses. Look the whole lot over.
If everything looks good, you can assemble the buckles and straps. Since
you are using tape, there is no gluing involved. Just place the buckles
as appropriate on the harnesses. The short adjustment straps you cut
earlier are positioned below the adjustment buckles. Use your knife tip
to lift up the ends and offset them for a more casual appearance. When
the buckles and straps are all assembled, they can then be moved over to
the seat and installed.
Again, since we used tape there is no gluing required. If some of the
adhesive has worn off from handling, however, you can use white glue
such as Elmer’s to keep them down. As a final touch, mix up a very thin
raw umber wash and use a fine brush to apply it over the straps only.
(You don’t want to cut the shine of those buckles you worked so hard
on!) I didn’t do this for the photos because I wasn’t sure it would show
up in the small pictures and I wanted to show all the other detailing. '
The wash will help blend the straps into the rest of the cockpit and
helps simulate the grease and grime from handling by lots of dirty
hands.
Well, that’s all there is to it!
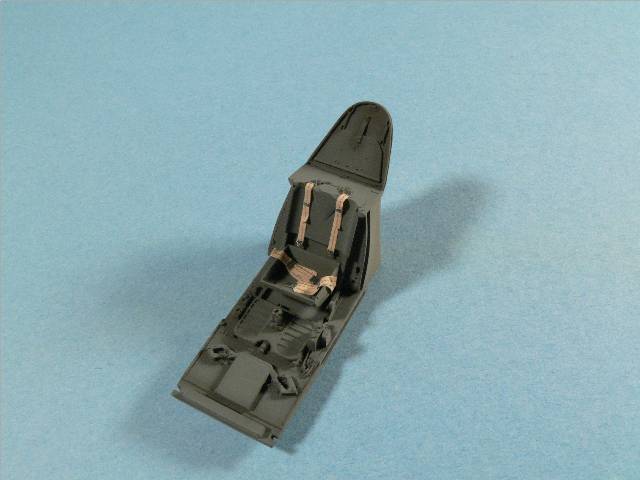
It seems tedious but it only takes about 45 minutes to do. The
finished seatbelts are shown at the beginning of this article installed
on the excellent Master Details cockpit set for the Bf-109 G-6 ready for
the wash.
Good luck and happy modeling!
Model,
Images & Text Copyright © 2007 by Rafe Morrissey
Page Created 04 January, 2007
Last Updated
24 December, 2007
Back to
HyperScale Main Page |
 Home
| What's New |
Features |
Gallery |
Reviews |
Reference |
Forum |
Home
| What's New |
Features |
Gallery |
Reviews |
Reference |
Forum |