|
Vector's 1/48 scale
Lavochkin La-5FN
by Joe Youngerman
|
 |
|
Lavochkin La-5FN |

HyperScale is proudly supported by
Squadron
Background
 The
Lavochkin La-5FN came on the scene in World War 2 as things were
beginning to go badly for the Germans in 1943. The roughly 1500 aircraft
that were delivered had an immediate and devastating effect on the
Luftwaffe. It's 1470 HP M-82FN engine delivered plenty of power for the
airframe and its 2 ShVAK cannons giving sufficient punch. It's few
shortcomings would be addressed in the La-7 which entered service the
following year. Many of the VVS La-5FN pilots considered themselves
nearly untouchable by enemy fighters. It was truly a deadly aircraft in
the hands of an experienced pilot. The
Lavochkin La-5FN came on the scene in World War 2 as things were
beginning to go badly for the Germans in 1943. The roughly 1500 aircraft
that were delivered had an immediate and devastating effect on the
Luftwaffe. It's 1470 HP M-82FN engine delivered plenty of power for the
airframe and its 2 ShVAK cannons giving sufficient punch. It's few
shortcomings would be addressed in the La-7 which entered service the
following year. Many of the VVS La-5FN pilots considered themselves
nearly untouchable by enemy fighters. It was truly a deadly aircraft in
the hands of an experienced pilot.
The Kit
Vector's resin kit is the newest
offering in 1/48th scale and and is just one in a series of VVS aircraft
they have released recently to satisfy that void that has existed for
some time in this and all scales. I am generally a 1/72 scale modeler
and can only hope that perhaps they will consider giving us some of
these beautiful kits in our scale!
I recieved my kit from Derek Brown's "Buffies Best" online store. Most
folks are familiar with Derek's talent so when he told me these kits
were really great I felt I could expect something special. I was not
disappointed.
The kit is entirely resin with one Vac canopy, solder for detailing, and
an impressive set of decals that I was pleased to discover go on without
drama or difficulty. The instructions are basic and some components such
as the pitot tube and armoured glass behind the pilot's seat must be
fabricated by the modeler.
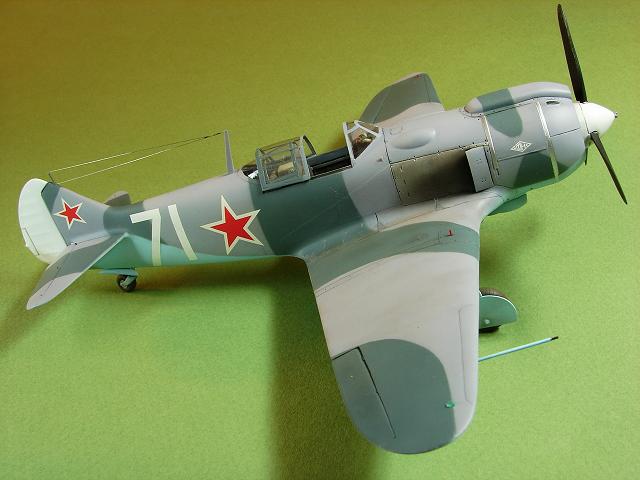
I started with the cockpit where I
added the rudder control cables, some levers, throttle linkage and a
little wiring here and there.
Click the thumbnails below to view larger images:
[../../photogallery/photo00022507/real.htm]
I also added a new attachment fitting
for the tail wheel strut and a new strut arm to go in it from plastic. I
would strongly recommend doing this as the resin parts will not hold the
weight of the a/c.
The main landing gear is impregnated
with a metal rod in the center...giving them considerable strength and
rigidity. The fit of the instrument panel is a little tricky and there
is no guidance at all from the instructions so use a little caution
here. (Good references are a must for this build).
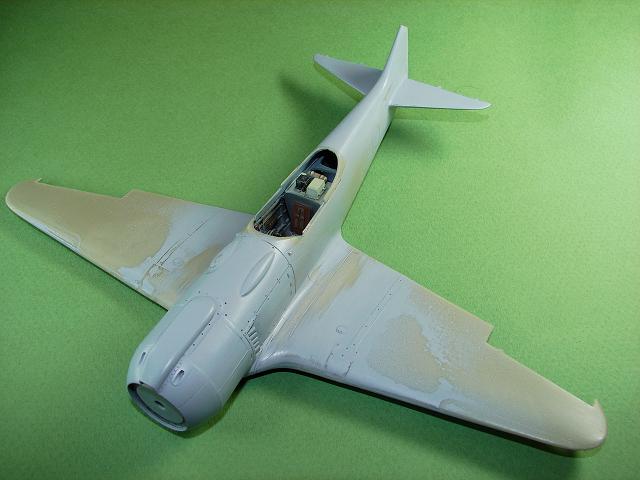
The fuselage halves need some clean-up
but mated very well with minimal filler being needed. The wing is molded
as one piece and fits easily onto the fuselage bottom...again with just
a little filler being needed at the wing root and at the bottom trailing
edge where it meets the fuselage.
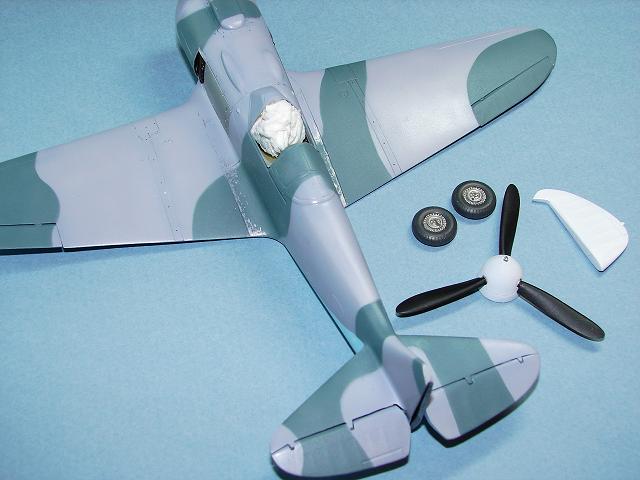
The tailplanes fit very snugly and need hardly any filler. All of the
control surfaces and molded as seperate items which is a nice touch.
They all go on well with just a small amount of trimming needed.
Vector's earlier kits came with rubber tires but the La-5FN's are
resin...thank goodness...I am not a fan of rubber tires! The spinner is
molded in two parts and the prop blades are seperate and must be added.
Once all the major components were on I coated the model with Mr.
Surfacer 1000 and sanded off the few imperfections one can expect to
find in most resin kits. It also filled the few remaining flaws in my
seam work.
I added the vac canopy before the
painting process began...be careful here. The fit is good but you only
get one. A bit of a shortcoming in my opinion and I think the canopy's
quality falls a little short of the rest of the kit. Brett addressed
this on his Lagg-3 build by using an aftermarket example...I used what
came with the kit and am satisfied with it. You will also find the upper
main gear doors need a little trimming to get a good fit but that was
about it as far as building challenges were concerned.
I used Erik Pilawskii's superb book
"Soviet Air Force Fighter Colors 1941-1945" for the camouflage colors
and patterns. The interiors were apparently a mixture of wood use primer
and ALG-5 metal primer in the La-5 series...the La-7 typically having
all ALG-5 used in the cockpit. The camoflage is an AMT-7/11/12 three
color scheme. I used White Ensign Models new enamel paint line for all
these colors. They are well researched and far more accurate than any
other paints currently available for VVS aircraft. When thinned properly
they spray beautifully and cure in about a day.
The metal exhaust areas are Alclad II
aluminum and the cowl bands were painted with Testors Chrome Silver. The
wing tip and rudder position lights are made from CMK resin parts and
are attached with white glue. I added them after the final flat coat but
then shot a quick coat of flat over them once applied. This gives a
weathered look more appropriate to the rest of the a/c. I don't think an
a/c built to look weathered looks terribly realistic with jewel-like
position lights that I have seen on some models. The model was weathered
with pastels and Prismacolor Pastel Pencils. The wing root fairings were
metal and heavily chipped in most photos I have seen so I gave this area
a little extra attention. The exhaust stains were airbrushed with a mix
of Testor's Tar and Burnt Umber acrylics...heavily thinned of course. I
added the radio wire from stainless steel.
This model was really a joy to build
and was the first all resin kit I have built. I'm very thankful to Derek
Brown and Vector for the chance to build this kit and to build something
in 1/48th scale. Something I have not done in many years and did not
think I would enjoy nearly as much as I did. I still plan to stay with
1/72 scale though....so come on Vector, lets have some of these gems in
a smaller size!
Click the thumbnails below to view larger images:
[../../photogallery/photo00021171/real.htm]
Model,
Images & Text Copyright © 2007 by Joe Youngerman
Page Created 23 February, 2007
Last Updated
24 December, 2007
Back to
HyperScale Main Page |
 Home
| What's New |
Features |
Gallery |
Reviews |
Reference |
Forum |
Home
| What's New |
Features |
Gallery |
Reviews |
Reference |
Forum |