|
Hasegawa's 1/72
scale
Junkers Ju 88
A-4
by Christopher Wilson
|
 |
|
Junkers Ju 88 A-4 |

Hasegawa's 1/72 scale Ju 88 A-4 is available online from Squadron
Background
Possessing excellent speed and maneuverability for a two-engined
bomber the Junkers Ju-88 was designed to perform both level bombing and
dive bombing roles and its versatility lent it to suitability for many
other types of missions as well, from the first days of the war to the
very end of the conflict. Over 15,000 were produced making it the 3rd
most produced German warplane of WWII, after the Bf-109 and the Fw-190.
The Ju-88 A4 variant first saw service in the summer of 1940. (Hasegawa
kit instructions)
The kit summary pretty well sums up what has to be one of the most
versatile planes of WWII. From the A-1 to its role in the Mistel
program, the Ju-88 was involved in all fronts in all conflicts and even
served in foreign hands.
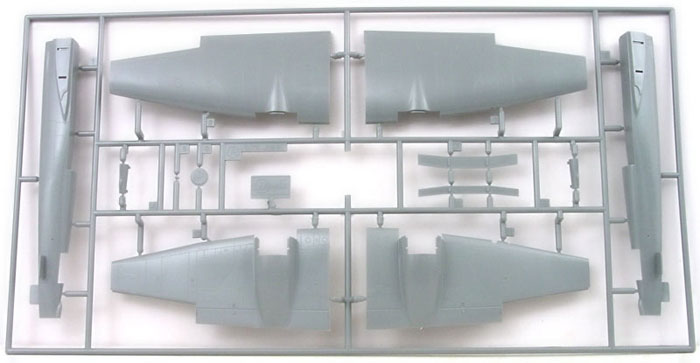
The Kit
The box contains 24 sprues, in light gray or clear plastic. The clear
parts are well formed and quite clear and the plastic is typical of what
we come to expect from Hasegawa, clean, crisp, and flash free. The
breakdown suggests several other variants. There are separate wing tips
a separate front fuselage and several seats included. The fact the tail,
wing tips, belly and cockpit sections are all on different sprues
furthers this hypothesis.
Since I started this a G has been announced and I fully expect
sometime down the road to see a Ju-188. Instructions are clear,
following 10 logical steps to completion. The marking choices are
interesting. You are given 3 options, KG51 Russia, KG30 Norway, and KGr.
106. All are in the standard RLM70/71/65 pattern but the last option is
from a night operations outfit and so the underside is over painted
black. Decals themselves are OK. They are a little thick, but react well
to Solvaset.
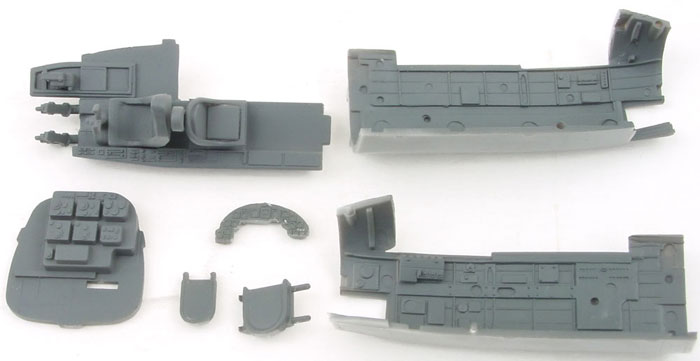
The quality of the molded parts is excellent with no flash and
visible sink marks only in the landing gear doors. The kit machine guns
could have been better and I’d have really appreciated a little PE fret
for gunsights, but OOB things look OK.
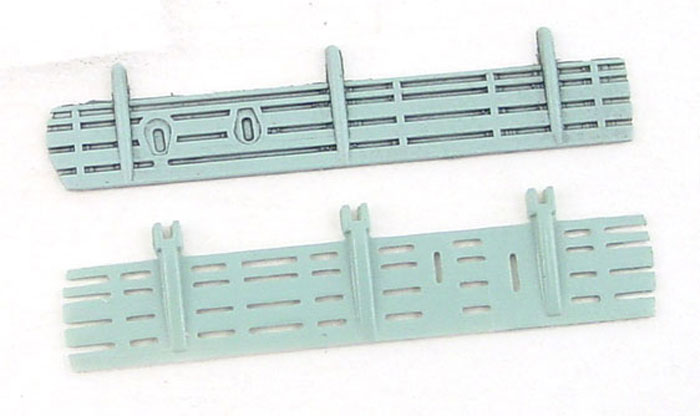
Click the
thumbnails below to view larger images:
[../../photogallery/photo00004278/real.htm]
One great thing is the level of detail in the cockpit. Hasegawa have
really stepped things up in this area and done a nice job of it, however
they did leave the cockpit floor intact (probably for another version)
when there should be a large hole for entry into the gondola. To their
credit this is scribed on the model and it is a simple affair to cut it
out, though no mention is made in the instructions.
The kit goes together well but because Hasegawa are getting their
mileage in variants from this one it doesn’t actually go together
easily. Fiddly is the best way to describe the fit. The gondola is 4
parts and needs seam cleanup, the upper canopy is also a little tricky
and the fuselage to cockpit join, though good, does require a bit of
filler, especially once the wings are mated.
I started with the cockpit and used the kit decals to see how they
look. I then got on with masking the clear parts as this is a real chore
for me and I wanted it out of the way. Next up was the fuselage and tail
area and this was the quickest and easiest part of the build. Wings were
next. The worst fitting parts had to be the engine nacelles but just
take your time and they’ll turn out fine. The good news is they mate to
the wings perfectly. Another good thing is the wing spars which set
dihedral at exactly the right angle.
Great care needs to be taken with fitting the gondola and canopy and
I would advise adding parts CA9 – CA12 to the cockpit early on in the
process before the cockpit joins the fuselage and certainly before the
wings are on.
The dive brakes need drastic thinning, just make sure to sand them
until you can practically see through them.
The brakes themselves are very accurate in detail and only need
thinning to be top notch.
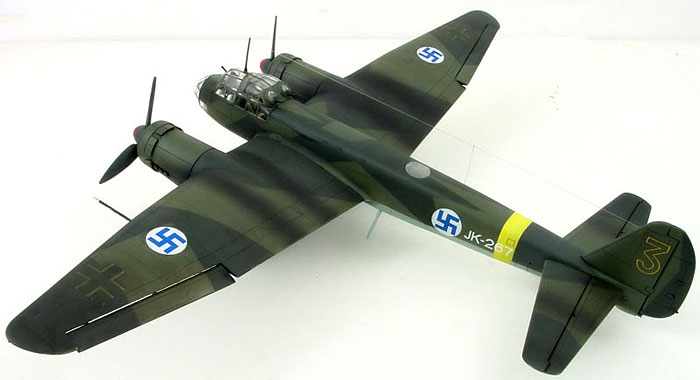
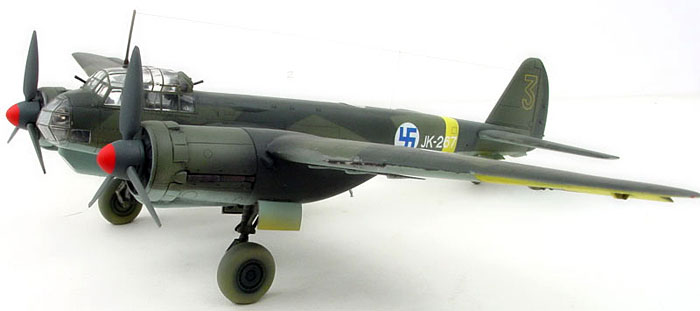
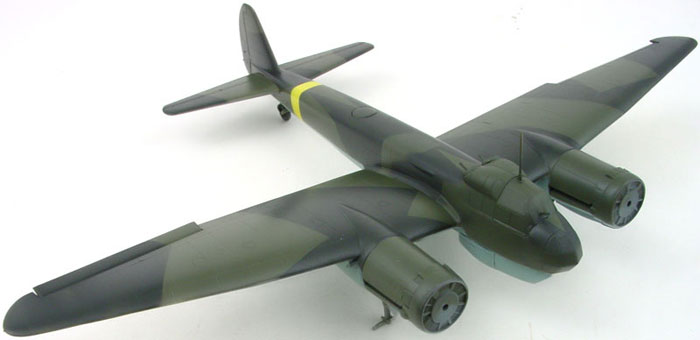
 I
decided on a Finnish scheme for my Ju-88 and ordered some decals from
Mike Grant, who was ever so kind to run me off a set. With those in hand
I gave the model a standard scheme of 70/71/65 with RLM04 ID markings
and I was off. I used a mix of paints for this since my stocks were low. I
decided on a Finnish scheme for my Ju-88 and ordered some decals from
Mike Grant, who was ever so kind to run me off a set. With those in hand
I gave the model a standard scheme of 70/71/65 with RLM04 ID markings
and I was off. I used a mix of paints for this since my stocks were low.
I used PolyScale, ProModeler, and MM Acryl. I used the Hasegawa
German nationals so I could lightly paint them out.
After painting I used a light wash of oils and mineral spirits
followed by a typical sludge wash.
Exhaust staining was airbrushed on using Gunze weathering colors.
Once sealed with a second gloss coat I gave the entire model a filter
of thinner and buff before finally sealing with PolyScale clear flat.
Hasegawa has released another winner.
With their He-111, Lancaster, and now the Ju-88 on the shelf I’m
eagerly awaiting the B-26. For those holding onto the older Italeri or
AMT kits, I’ve compared them and the Hasegawa is no surprise heads and
shoulders above the rest. My collection badly needed a well done Ju-88
and now I have one. If you’ve been waiting for the definitive Ju-88 in
1/72 you don’t need to wait anymore. Pick one up, be happy.
Thanks go to Dragon USA, via Saul Garcia, for the review sample.
Rating 4 of 5.
Click the
thumbnails below to view larger images:
[../../photogallery/photo00007339/real.htm]
Model,
Images & Text Copyright © 2007 by
Christopher Wilson
Page Created 04 January, 2007
Last Updated
24 December, 2007
Back to
HyperScale Main Page |
 Home
| What's New |
Features |
Gallery |
Reviews |
Reference |
Forum |
Home
| What's New |
Features |
Gallery |
Reviews |
Reference |
Forum |