|
Airfix's
1/72 scale
Britten Norman
Islander
by Mark Davies
|
 |
|
Britten Norman Islander |

HyperScale is proudly supported by
Squadron.com
What better way to introduce the Islander
than lift a quote from Britten Norman’s website?
“The ubiquitous Islander is the best-selling commercial aircraft
produced in Western Europe. Adaptable, versatile and durable, it has an
unsurpassed record of solving transportation problems simply and
economically in some of the world's harshest environments.
Ten seats, twin engines and a design driven by the requirement for ease
of operation provide exceptional levels of utilisation. Constant
refinement ensures that the Islander continues to excel in modern-day
roles including environmental protection, transportation, air ambulance,
fisheries protection, photo surveying, policing and parachuting to name
but a few.”
Certainly the Islander is a popular
aircraft in my country, New Zealand, where it has proven ideally suited
in a number of tourism operations. When I got the re-release of the
Airfix kit I was pleasantly surprised to see that it included attractive
decals for an aircraft operated by Real Journeys
http://www.realjourneys.co.nz/,
a company based near my parents’ home town where it is used for mountain
sight seeing in the Milford Sound Area of Fiordland. As such it formed a
good choice for my first Kiwi modelling subject after over 90 previous
builds.
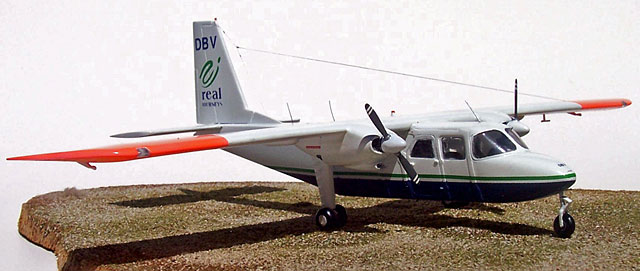
The Airfix kit is quite good for an early
1970’s offering, but is spoiled by thousands of rivets and over-stated
external fuselage reinforcing. On another slightly critical note, I feel
it would have been better to have moulded all three cabin doors shut,
rather than offer less than perfect fitting separate ones. These things
said, the kit is simple, has adequate internal detail for a closed
cabin, and captures the lines of the Islander well.
I got in touch with Real Journeys and they were very helpful in
forwarding a number of images of some of their aircraft to me.
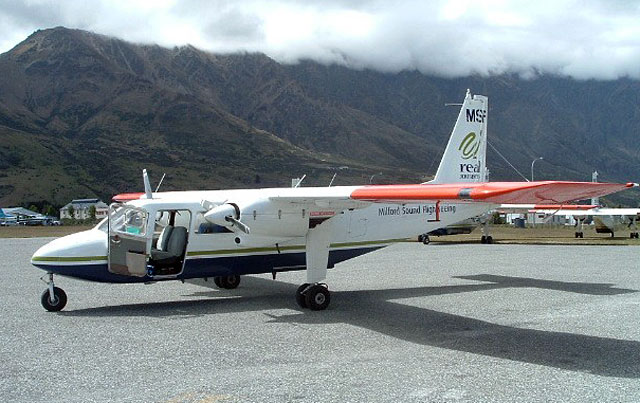
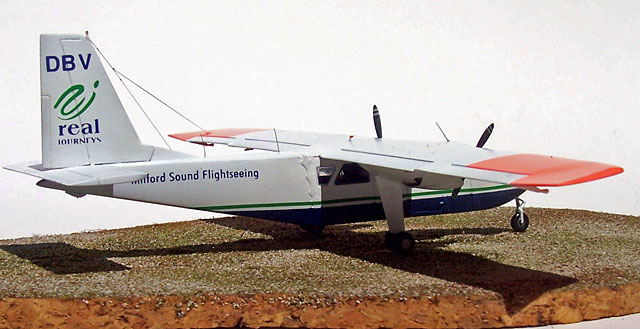
This soon revealed that I needed to add
an additional rear window on each side of the fuselage, and that the
aircraft needed to look smooth. To be honest removing the rivets was the
hardest part of construction, although I barely found room for weights
to prevent tail sitting: A thin lead sheet was placed under the cabin
floor, plus the nose and engine nacelles were crammed with lead shot.
Painting should have been straight forward, but I failed to use a matt
white undercoat which led to problems with coverage in gloss white.
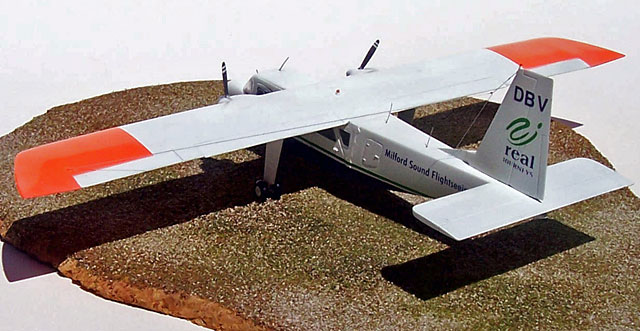
Other than that it was a simple build,
and I can recommend this kit to anyone who fancies adding this
significant, if basic, aircraft to their collection.
Click the thumbnails below to view larger
images:
[../../photogallery/photo00031874/real.htm]
Model, Images and Text
Copyright © 2007 by
Mark Davies
Page Created 25 February, 2007
Last Updated
24 December, 2007
Back to
HyperScale Main Page |
 Home
| What's New |
Features |
Gallery |
Reviews |
Reference |
Forum |
Home
| What's New |
Features |
Gallery |
Reviews |
Reference |
Forum |