|
Hasegawa's 1/32 scale
Focke-Wulf Fw 190 A-6
by
Ian Robertson
|
 |
|
Focke-Wulf Fw 190 A-6 |

Hasegawa's 1/32 scale
Focke-Wulf Fw 190 A-5 is available
online from Squadron.com
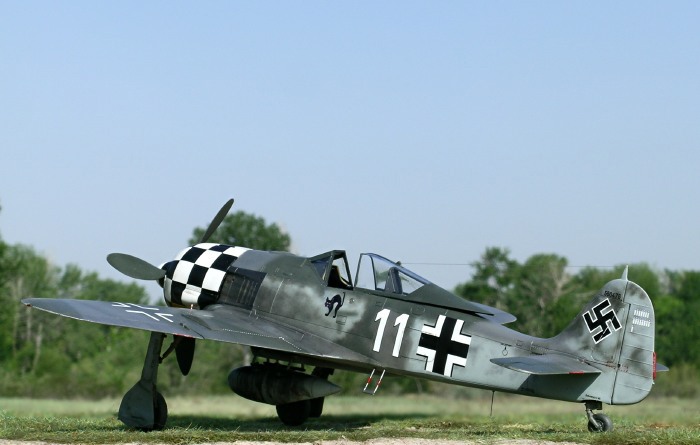
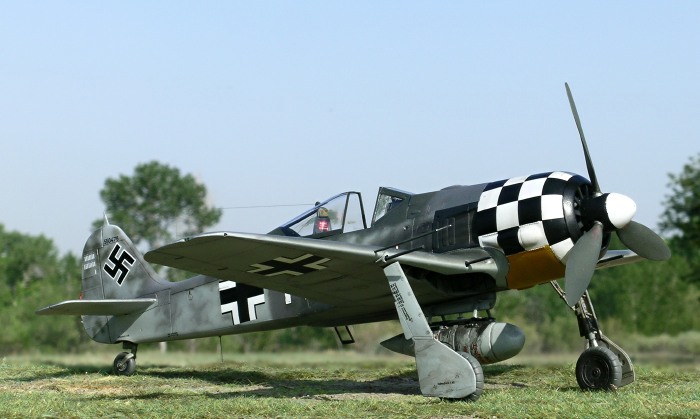
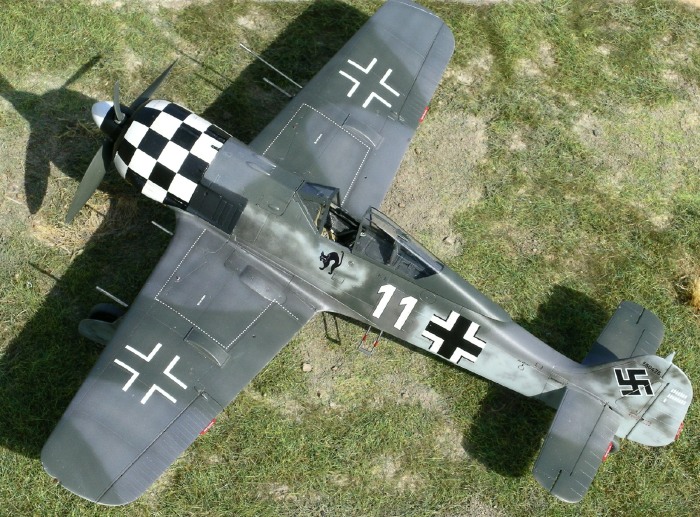
This is Hasegawa’s 1/32 scale Fw 190 A-6 in the markings of Oblt.
Georg Schott’s “White 11” (W.Nr. 550476) based in Deelen, Holland with
1./JG 1 in late August 1943.
Schott was shot down in the North Sea by Allied aircraft at the end
of September 1943. Although he was able to reach his life raft, he did
not survive the incident.
For reference material I relied on photographs in Mombeek’s “Defenders
of the Reich, Volume Two” (Classic Publications, pg 188), and a color
profile in Soler and Gimeno’s “Focke Wulf Fw 190 and Ta 152” (Acción
Press, pg 57).
Hasegawa’s 1/32 scale Focke-Wulf Fw 190 A-6 maintains the superb
quality and affordable price of their other recent Wurger releases.
Nevertheless, a couple of issues should be addressed to improve on
accuracy. First, Hasegawa’s instructions show the control stick
installed backward in the cockpit, so be sure to turn it around. Second,
the placement of the gun sight is incorrect in the kit because it
interrupts the padding that extends across the front of the coaming
above the instrument panel. Therefore, I repositioned the gun sight
further forward and added a strip of styrene rod to fill the gap in the
padding. Third, the instructions show the attachment of the FuG 16zy
antenna under the wing (step 12), which was incorrect for an A-6. This
antenna was not used until the A-7.
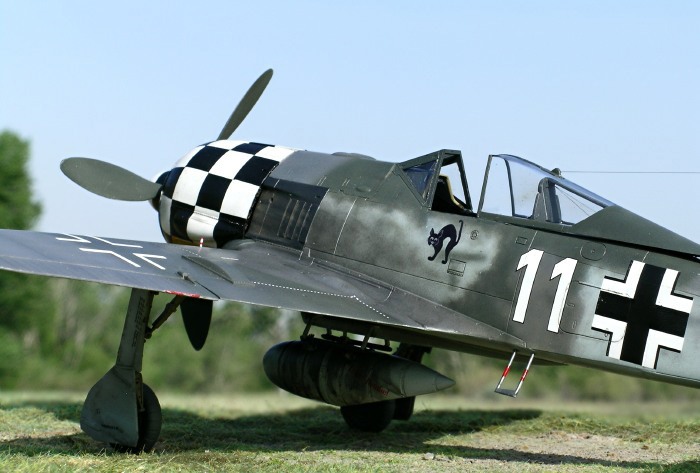
Although the kit’s cockpit is well detailed in my opinion, I replaced
the seat with one produced by Cutting Edge, and I made my own seatbelts
from lead foil with brass buckles from MDC. The dials on the instrument
panel were added individually by punching them out from an MDC
instrument panel decal sheet using a Waldron punch and die set. I
painted the cockpit RLM 66 using Polly Scale acrylic.
To each landing strut I added brake lines made from fine solder wire
(purchased from Derek Brown at Buffie’s Best). The oleos were covered
with bare metal foil, and the holes in the oleo scissors were drilled
out. I added treaded tires from Loon Models because the kit’s tires lack
treads.
Other aftermarket additions included Eagle Parts outboard canon
fairings (#32-56) and an Eagle Parts drop tank (#32-21). I made the
pitot tube from syringe tubing.
 I
began painting by spraying Tamiya white surface primer from a rattle can
to the cowl and then masking the cowl until the camouflage had been
applied. This particular aircraft wore a standard camouflage scheme of
RLM 74/75/76 with yellow under the cowl, all of which I applied using
Polly Scale acrylics. I
began painting by spraying Tamiya white surface primer from a rattle can
to the cowl and then masking the cowl until the camouflage had been
applied. This particular aircraft wore a standard camouflage scheme of
RLM 74/75/76 with yellow under the cowl, all of which I applied using
Polly Scale acrylics.
I painted the propeller blades in standard RLM 70 “black green”, and
the spinner black and white. The wheel wells and undercarriage were
painted RLM 02.
Once the paint was dry, I sprayed a thin coat of Future floor wax over
the model to give it a glossy finish in preparation for decals. I used
Eaglecals sheet #83 for the national markings, swastikas, stencils, cowl
checkers, and the white “11” on each side of the fuselage (note that two
#83 sheets were needed to complete the 11’s). The kill markings on the
rudder were patched together using Eaglecals sheet #99.
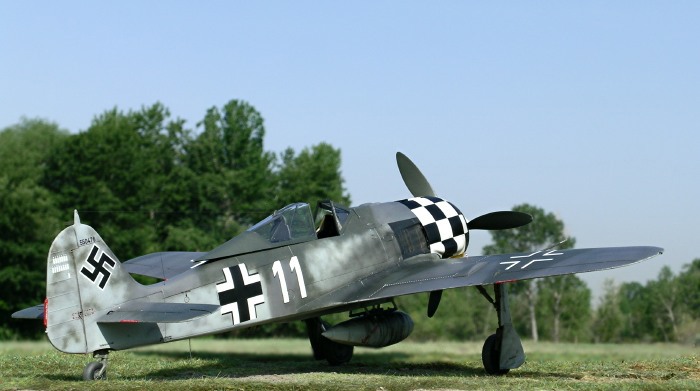
I printed my own decals for both the cat symbol beneath the cockpit and
the work number on each side of the tail.
I used Microsol to help snuggle the decals into the panel lines. The
checkerboard decals from the Eaglecals sheet went on without a hitch –
kudos to Microscale and Eagle Editions. Once the decals had dried I
applied a second coat of Future, followed a day later by a 50/50 mixture
of Polly Scale clear satin and clear flat.
Groundwork
A wooden cutting board was used as the base for the model. Celluclay
was used to make the basic ground cover. The celluclay powder was mixed
into a paste with water and white glue, tinted with brown acrylic paint,
and then spread thinly over the cutting board. Note that the cutting
board had previously been treated with several coats of clear lacquer to
prevent warping while the celluclay dried.
While the celluclay was still wet I added pieces of Heki grass mat
(item # 1574 - Wild Grass Savanna), fine sand, and small bits of moss.
Heki products are available for purchase in the United States from
“Scenic Express”.
Images of the completed model were taken outdoors in natural light with
a Nikon Coolpix 5400 digital camera. The “unsharp mask” tool of Adobe
Photoshop was used to restore some of the clarity and crispness lost
during image compression.
Click on the thumbnails
below to view larger images:
[../../photogallery/photo00032090/real.htm]
Model, Images and Text Copyright ©
2007 by Ian Robertson
Page Created 21 June, 2007
Last Updated 24 December, 2007
Back to HyperScale
Main Page
|
Home
| What's New |
Features |
Gallery |
Reviews |
Reference |
Forum |