|
Classic Airframes' 1/48 scale
Dornier Do 17 Z
by John Valo
|
 |
|
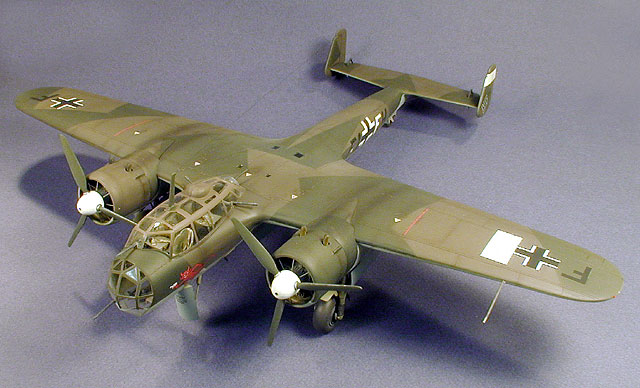
Dornier Do 17 Z in Luftwaffe Service |

Classic Airframes' 1/48 scale Dornier Do 17 Z is available
online from
Squadron
Classic Airframes' second release of the 1/48 scale Do 17 Z is the
'Battle of Britain' version, featuring decal options for four aircraft
(including one with Black undersides).
For all of you out there who, like me, would intermittently drag out the
Hobbycraft Do 17 and putter with it for a while, only to return it to
the darkness of the Models I'll Build Someday closet, this
release is very welcome.
I have always had a soft spot for the Do 17 Z as being a true iconic
participant in the Battle of Britain, as well as a nifty looking plane
in general.
As with any kit of this nature, you will need to spend a fair amount
of time cleaning up and test fitting parts. On my particular kit, there
was a fine hair of flash on most of the plastic parts, easily removed
with the swipe of a blade. The resin parts are of the expected high
quality and the commendably thin clear parts look great after a bath in
Future.
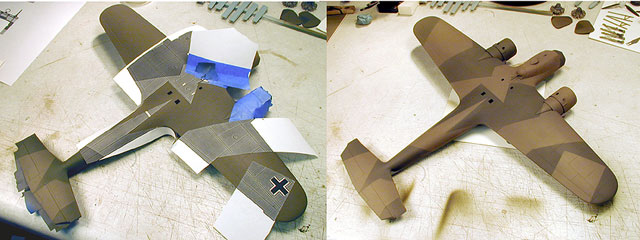
As usual, I spent my initial modelling sessions cleaning up, painting,
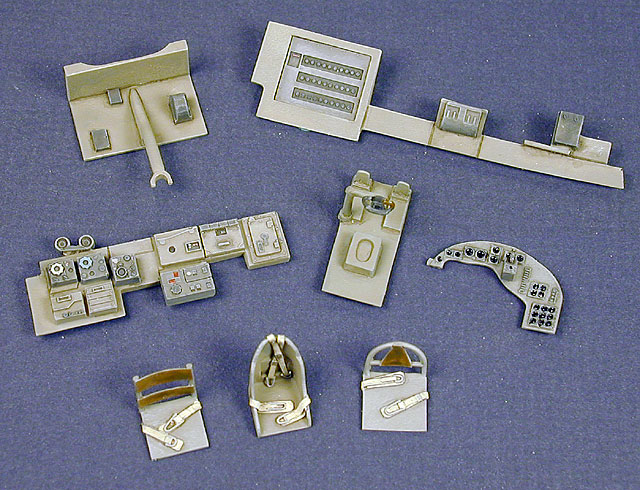
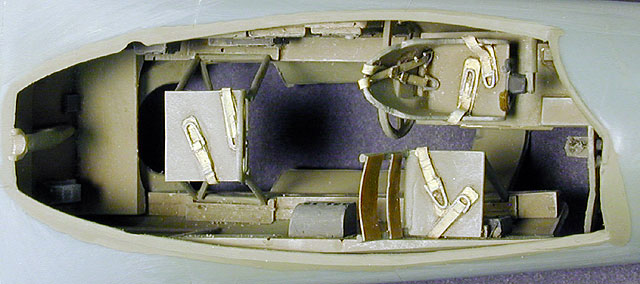
weathering and bagging all the various parts. I started assembly with
the cockpit, and was pleased to discover that considerable thought went
into providing alignment tabs and slots for the main parts. I added seat
harnesses and belts from tape and fine wire. The cockpit fills up in a
hurry, but everything fits. Building this area really gives a
perspective to the cramped and vulnerable conditions the aircrews
endured during the war...
I elected to leave the top and bottom nose sections unassembled until I
had the rest of the airframe completed to avoid any unnecessary gaps.
I attached the lower wings to the full-span upper section and tweaked
the wingroot fit by trimming the small alignment tabs at the roots. The
nacelles do seem to be 'handed' port and starboard, but I still had to
fill in some small gaps at the leading edge junctions. I would recommend
finishing the wing/fuselage assembly before attaching the horizontal
stabilizer, as this makes aligning the airframe a lot easier (had to
learn that one the hard way, but no damage done).
I then attached the upper nose section to the main airframe, slightly
sanding the edges for a perfect fit. By offering up the lower section
(with all the fiddly cockpit stuff hanging out!) without applying glue,
I was able to 'lock' the parts in place for a practically gap-free fit
before applying liquid cement to the joints.
The canopy is slightly wide at the center, but fits well. I separated
the barrels from the machine guns and glued the gun bodies into the
clear parts using epoxy. The lower nose section glazing provided a bit
of a challenge as it incorporates an insert for the bomb sight fairing
and these parts in turn attach to a jagged fuselage cutout. Careful test
fitting and a bit of sanding was necessary, but in the end it all fit
properly. Careful sanding and test fitting is also necessary to fit the
nose cap glazing, as on my example there was a bit of flash extending
around the edge.
To mount the engines, I made two thin spacers to go behind the resin
engines. There is a mounting tab incorporated into the casting, but it's
a bear to try to clean up around. I used five-minute epoxy to allow me
time to rotate and align the engines inside the cowlings. I added the
spindly cowl support struts from thin styrene rod. By using slow-setting
glue, I was able to assemble and align the landing gear assemblies
without any problems.
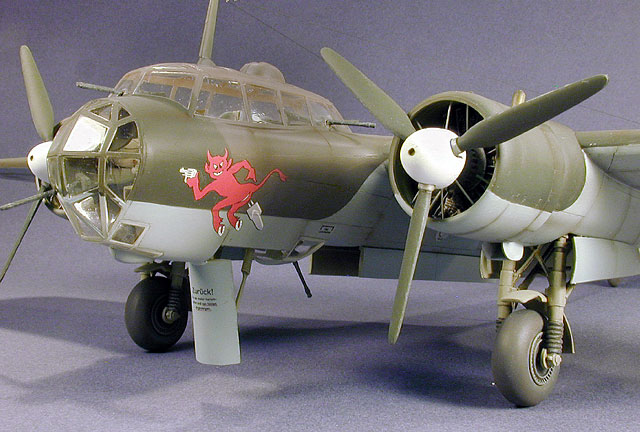
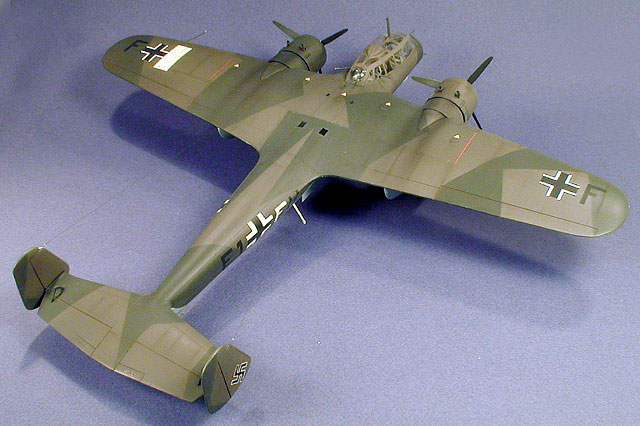
I painted the model using Polly Scale paints, then clear coated it
with Future. My favorite way to paint Luftwaffe splinter camouflage is
to scan the color guide pattern, enlarge it to scale, and cut out the
various segments for masks.
 The
Cartograf-printed decals went on flawlessly, with only a bit of MicroSol
being used on some of the areas of the larger decals. The
Cartograf-printed decals went on flawlessly, with only a bit of MicroSol
being used on some of the areas of the larger decals.
I couldn't resist the KG 76 pistol-waving Devil 'depositing' his
bombload. The white is very opaque; registration is perfect.
The final clear coat was Flat Polly Scale Clear.
If you're in the market for a 1/48 scale Dornier, this is clearly the
only game in town. Like any modeling project, the end result is directly
proportional to the time and effort put into preparing and assembling
the kit parts.
Though decidedly not for the rank beginner, I would highly recommend
this kit to anyone with some experience with multi-media kits. Thanks to
Classic Airframes for the opportunity to review this model!
Click on the thumbnails
below to view larger images:
[../../photogallery/photo00027521/real.htm]
Model,
Images & Text Copyright © 2007 by
John Valo
Page Created 13 December, 2007
Last Updated
24 December, 2007
Back to
HyperScale Main Page |
 Home
| What's New |
Features |
Gallery |
Reviews |
Reference |
Forum |
Home
| What's New |
Features |
Gallery |
Reviews |
Reference |
Forum |