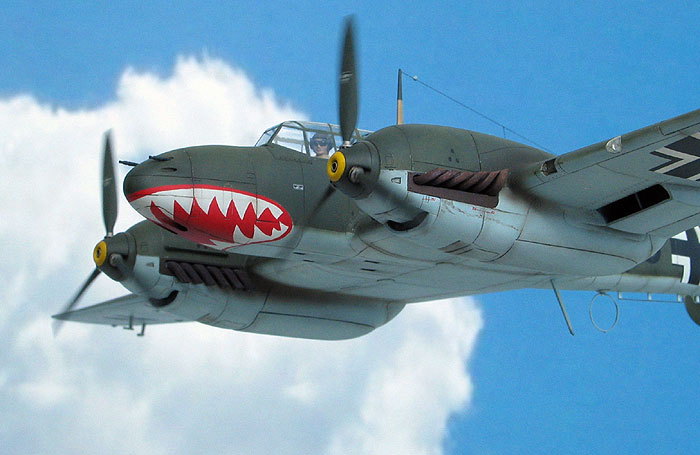
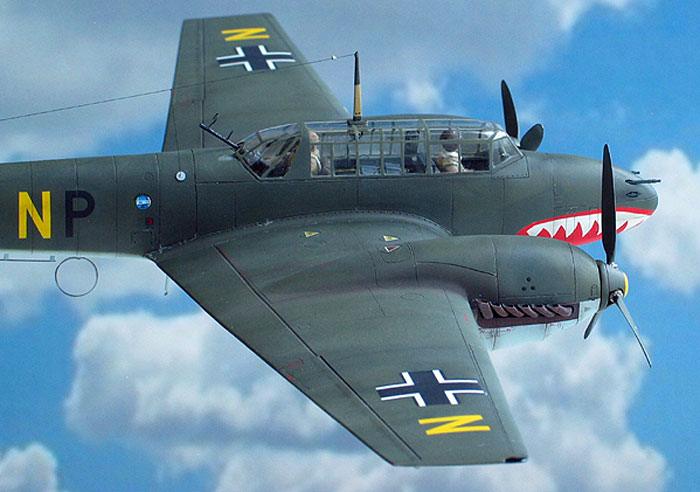
This is Fujimi’s 1/48 Bf 110 C/D finished as the mount of
Hans-Joachim Jabs of II/ZG 76, summer of 1940, just before the
Zerstorers’ fall from grace. I was inspired by Fujimi builds by
Brett Green in his Osprey Modelling book, and Matt Swan on his
website.
Aftermarket items include:
-
Squadron’s vac-form canopy, to
avoid the armoured windscreen
-
Lone Star Model’s resin cockpit.
In addition to its other advantages over the kit cockpit, it
enabled me to place the sidewalls a couple of millimeters proud
of the fuselage cockpit lip, permitting more positive seating
for the vacform canopy.
-
Aires’ MG 15 and 17s
-
Eduard’s photo-etch, useful
mainly for the radiator bays and extra cockpit details
-
Ultracast Bf 109E spinners and
props: the spinners were 1-2 mm too large in diameter for this
kit, and had to be ground down to fit the nacelles.
-
Hobbydecal dry transfers
-
Moskit exhausts: although they
cost as much as the kit itself, what aircraft is more deserving
of these little gems?
The pilot is a resin re-pop of Tamiya’s A6M2 pilot, heavily
modified (he turns up in a lot of my builds) and the bordfunker is a
leftover Verlinden USN pilot, again heavily modified, with plumber’s
epoxy parachute pack.
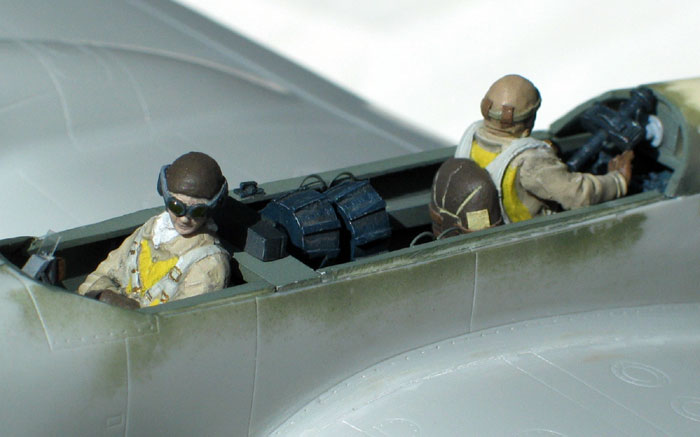
The tail wheel is a modified Eduard 1/48 P-39 nose wheel, as the
kit wheel is noticeably tiny. FuGI 2F antenna is scratchbuilt, as is
the port wing landing light.
 Paint
Paint
Paints are Lifecolor RLM 70 and 71, with my own mix for RLM 65
consisting of Lifecolor Non-specular Blue-Grey mixed with White at a
ratio of 3:7. Finish is Polly Scale Flat mixed with Satin at a ratio
of 2:1.
Weathering was achieved with Tamiya mixes thinned to around 95%
isopropyl alcohol , minimal pastels, and a silver artist's pencil.
Markings
Decals are Techmod, but underwing balkenkreuz, all "N’s" and the
haifisch mouth are all masked and sprayed. The shark mouth
masking was built up in layers of Tamiya masking tape cut to shape.
This was done by applying tape to an overhead projector acetate
transparency onto which Techmod’s (not quite satisfactory) shark
mouth decal had been photocopied. By using multiple copies, I was
able to cut out the shapes needed to get the result I wanted, and
the tape still had plenty of stick after being removed from the
acetate for application to the model.

Having a copy of the kit decals on overhead acetate was useful in
another way. I suffered some random severe silvering on a couple of
the fuselage code decals that I couldn’t fix. I used the same method
to cut out exact masks of the offending codes, and could then touch
up the RLM 70 and 71 around the letters by airbrush, covering the
silvered areas. (I have in the past used tape to remove decals, both
intentionally and alas unintentionally, so I knew enough to temper
the tackiness of the masking tape with a brief application to my
forehead). This serendipitous experience has me thinking I should
make acetate copies of decals before all my builds.
In retrospect I wish I had:
- sat Hauptmann Jabs six scale inches further forward. I find
one of the most challenging parts of building in-flight is the
trial and error process of getting your custom-made figure to
fit the cockpit in a realistic position matching photo evidence.
- confirmed the spent casing chute arrangement on the ventral
nose more thoroughly. This was the best I could determine from
scant photographic evidence.
- opened up the bordfunker’s canopy hatch, however as it was
there were already stages of the build where I felt my ambition
over-reached my ability. ("As you know, I’ve always thought we
tried to go a detail too far")
The after-market additions effectively quadrupled the price of
the kit, but if it keeps me occupied for six months, that’s still
pretty cheap entertainment!
Photos are taken in overcast sunlight, in front of a cloudscape
poster (obtained from
www.zazzle.com –lots
of choices); prop-spin is done the low-tech way with a hair-dryer.
I’m a long way from a model club (you lot are it!), so
any feedback positive or negative is welcome, and I don’t mind
either variety being posted on Plane Talking. Thanks for looking.
Glen "I’m Not Waiting For Eduard" Percy
 Home
| What's New |
Features |
Gallery |
Reviews |
Reference |
Forum |
Home
| What's New |
Features |
Gallery |
Reviews |
Reference |
Forum |