|
Hasegawa's
1/32
scale
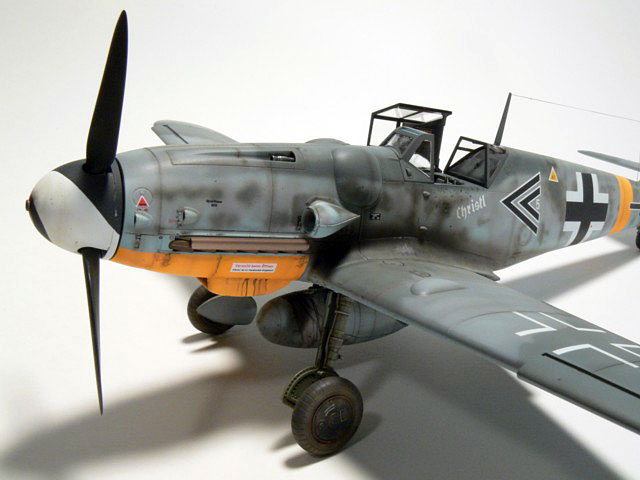
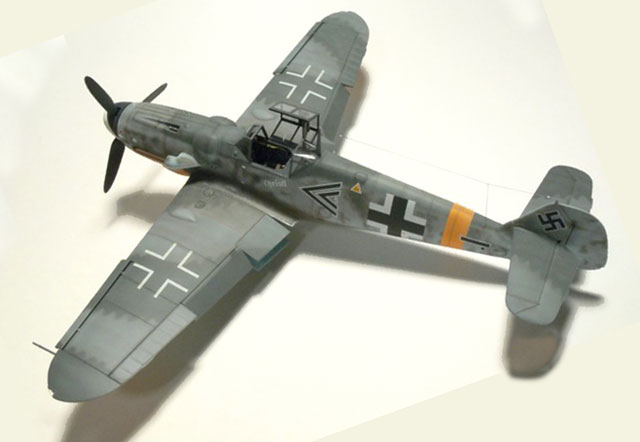
Messerschmitt Bf 109 G-6
by Rafe Morrissey
|
 |
|
Messerschmitt Bf
109 G-6 |

Hasegawa's 1/32 scale Messerschmitt Bf 109G-6 is available online
from Squadron.com
A couple of years ago I produced a
how-to modeling DVD with Floyd Werner using Hasegawa's 1/32 scale
Messerschmitt Bf 109 G-6 as the subject aircraft.
I have wanted to built the kit ever since, but
alas, working on the second DVD and my glacial pace of building always
interfered. I had been slowly working on the kit along with the DVD set
at the various shows we attended but didn’t make much progress. I
finally decided to put everything else aside and get the project
finished.
Here is the result. It was a lot of fun to work
along with the program.
Even though I am a fairly experienced builder, I
followed along with Floyd’s instruction trying to do everything the way
he did. It was very liberating to put aside all my preconceptions on
how to approach various tasks and I definitely discovered several
alternate approaches that I will be incorporating into my building
repertoire.
Plus, I was confident in the knowledge that if
anything went wrong, it would be all Floyd’s fault!
Seriously, it was great fun and I was very
fortunate in that Floyd was kind enough to let me come over to his
workshop and give me advice as I attempted the challenging task of
mottling. Thanks to his expert instruction, things came out very nicely
indeed.
The model was built out of the box with the
exception of installing the masking tape seatbelts I made for the
how-to article I wrote for Hyperscale.
 The
model was primed with Tamiya White Surface Primer from a spray can. The
model was primed with Tamiya White Surface Primer from a spray can.
The RLM 74/75/76 color scheme was applied using
custom mixes I prepared from Tamiya acrylic flat colors. I used
TESTOR'S Acryl Clear Gloss and Clear Flat for the clear coats.
For the weathering I used a combination of the oil
wash and other weathering techniques demonstrated by Floyd on the DVD;
and continued to practice the diffusion and post shading techniques
demonstrated by our Editor, Brett Green, and Chris Wauchop in the Osprey
Modeling series.
The super thin mix of Tamiya XF-64 Red Brown and
XF-1 Flat Black and Tamiya thinners is proving to be a magic elixir
allowing for very subtle shading of the panel lines and building up of
the exhaust streaks. I also used it to overspray the exhausts and
shields that had previously been painted Alclad II Burnt Metal. The
combination of the two produced a very convincing burnt metal look to my
eye.
All in all, this project was great fun and I am
pleased with the results. I’m grateful to Floyd for sharing his
knowledge and helping me take my building to a new level.
Click on the thumbnails
below to view larger images:
[../../photogallery/photo00031817/real.htm]
Text and Images Copyright
2007 by Rafe Morrissey
Page Created 06 March, 2007
Last Updated
24 December, 2007
Back to
HyperScale Main Page |
 Home
| What's New |
Features |
Gallery |
Reviews |
Reference |
Forum |
Home
| What's New |
Features |
Gallery |
Reviews |
Reference |
Forum |