|
Classic
Airframes' 1/48
scale
B-57B Canberra
by
Tory Mucaro
|
 |
|
B-57B
Canberra
|

Classic
Airframes' 1/48
scale B-57B
Canberra is
available online
from Squadron
For a
detailed
examination of
the contents of
Classic
Airframes' 1/48
scale Canberra,
see the in-box
review elsewhere
on HyperScale.
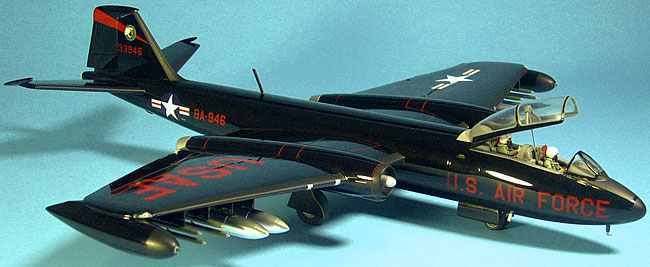
Classic
Airframes 1/48
B-57B Night
Intruder
This tale begins
back in the fall
of 2006 when my
local hobby
shop, Jersey
Shore Hobbies,
got in a batch
of Classic
Airframes B-57B
kits. The B-57B
has always been
one of my
favorite
aircraft,
especially the
gloss black
Night Intruder
version. Maybe
it goes back to
my fixation of
the old Batman
TV series with
its wonderful
Batmobile,
resplendent in a
striking gloss
black and red
pinstriped paint
scheme. So when
I saw that one
of my favorite
aircraft was now
available in my
favorite scale,
I knew I would
have to have
one. However,
the $69.00 price
of admission was
a little beyond
my means at the
time. So I
whined a little
to Tom, the shop
owner, and left
the store empty
handed.
Well,
unbeknownst to
me, my wife and
kids went back
to the hobby
shop and
purchased one
for me for
Christmas. Now I
have been
married for 23
years, and never
in all those
years has my
wife purchased a
model kit for
me, so I was
completely
bowled over when
I opened my
present
Christmas
morning. I must
have acted like
a little kid who
finally got what
he wanted for
Christmas,
because my wife
just rolled her
eyes and went
about preparing
for the company
we were
expecting later
in the day while
I just sat
there, examining
the parts and
imagining all
the happy hours
we were going to
spend together,
me and my
plastic “grail”!
Let me tell
you that having
never built a
Classic
Airframes kit
before, I really
didn’t know what
to expect. But
this kit, while
by no means a
click together
kit, was an
absolute
pleasure to
build. It soon
became obvious
that it was
designed and
engineered by a
company that
knows what it is
doing. The resin
parts fit
together as if
by design, a
rare occurrence
from my
experience with
resin details.
The plastic
parts too went
together with
surprisingly
little filler.
All in all,
everything was
well done and
made perfect
sense. I only
deviated from
the stock kit in
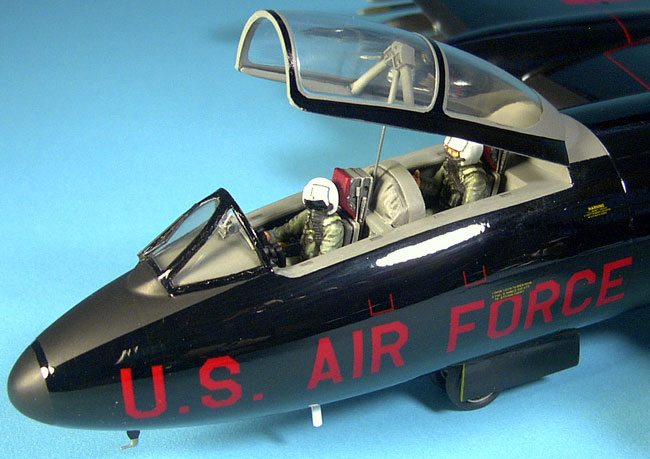
a few places. I
decided I would
build this
aircraft on the
ground and with
the crew in
place as if it
were preparing
for a mission.
The rudder and
elevators were
cut off and
repositioned for
a more candid
look. The crew
was “borrowed”
from a Revell
EA-6A kit. And
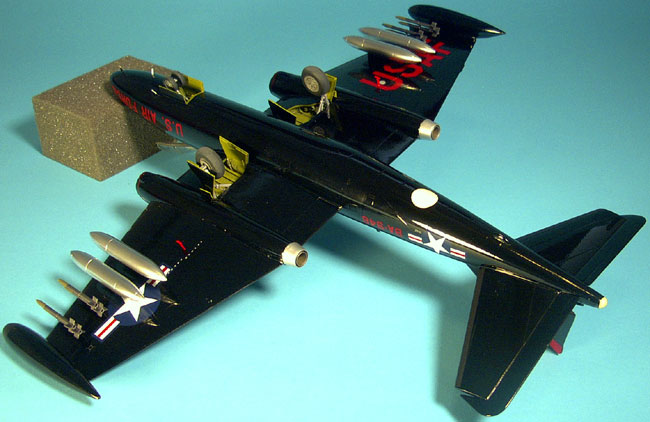
instead of the
clunky looking
750 pound bombs,
I decided to go
with some much
cooler looking 5
inch HVAR
rockets
(generously
supplied by my
buddy Pat Hawkey
from his
apparently
endless
stockpile of
spare parts!).
The forward
fuselage halves
were glued to
the rear halves
prior to
assembling the
left and right
fuselages
together, and
again, very
little filling
or sanding was
required to make
them look as
though they were
always one
piece. I pressed
some Super
Sculpy into the
nose area to
create a form
for the nose
weight, then
poured a RTV
mold and cast
low temperature
melting point
Cero Bend metal
into it for the
weight. It fits
perfectly into
the nose and
keeps the model
firmly planted
on it nose gear.
Another plus
with this kit is
that the cockpit
can be left out
of the model
until after the
fuselage halves
are glued
together and
seems sanded. I
found it can be
carefully
slipped in over
the gear well
and glued in
place flush with
the top of the
cockpit opening,
as per that
actual aircraft.
The cockpit
itself is
adequately
detailed as far
as I’m
concerned, and
the borrowed
crewman needed
very little
modification to
fit in the
seats. I did
glue the control
column to the
pilots hand
before gluing
him in place, as
it is far easier
to line things
up that way.
The model was
painted overall
Tamiya Gloss
Black lacquer
from the spray
can. The
excellent kit
supplied decals
were applied,
and then
everything was
over coated with
automotive two
part clear
urethane.
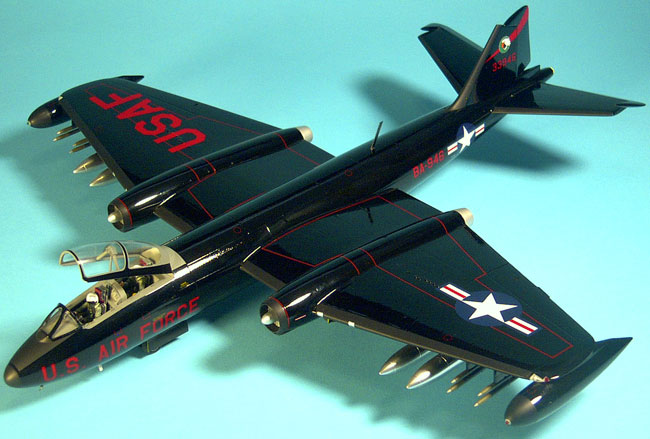
 The
leading edges
were painted
Polly Scale
Night Black to
represent the
rubberized
coating on the
real aircraft.
The rest of the
model was
painted with
various Model
Master, Floquil
and Polly Scale
colors. The
leading edges
were painted
Polly Scale
Night Black to
represent the
rubberized
coating on the
real aircraft.
The rest of the
model was
painted with
various Model
Master, Floquil
and Polly Scale
colors.
The wing tip
lights were
drilled out from
behind with
Tamiya clear red
and green
painted into the
recess, and the
wing tip tanks
had stretched
clear plastic
lights added to
the fronts, also
over coated with
Tamiya clear red
and green.
I finished
the model 9:00
pm the night
before
MosquitoCon
where it was
very well
received and
wound up
finishing second
in the very
competitive 1/48
Jet Category. It
now resides in a
place of honor
above my
computer desk.
In addition to
being a nice
model of one of
my favorite
aircraft, it
holds a very
special place in
my heart as the
one and only
model kit my
wife has ever
bought for me.
With gratitude,
I dedicate this
build to her, my
long suffering
spouse.
Thanks Lisa!
Click the
thumbnails below
to view larger
images:
[../../photogallery/photo00005722/real.htm]
Model, Images &
Text Copyright
©
2007 by Tory
Mucaro
Page Created 16
April, 2007
Last Updated
24 December, 2007
Back to
HyperScale Main Page |
 Home
| What's New |
Features |
Gallery |
Reviews |
Reference |
Forum |
Home
| What's New |
Features |
Gallery |
Reviews |
Reference |
Forum |