|
Roden's 1/32 scale
Albatros D.III
by
Ian Robertson
|
|
|
Albatros D.III |

Roden's 1/32 scale Albatros D.III is available online from
Squadron.com
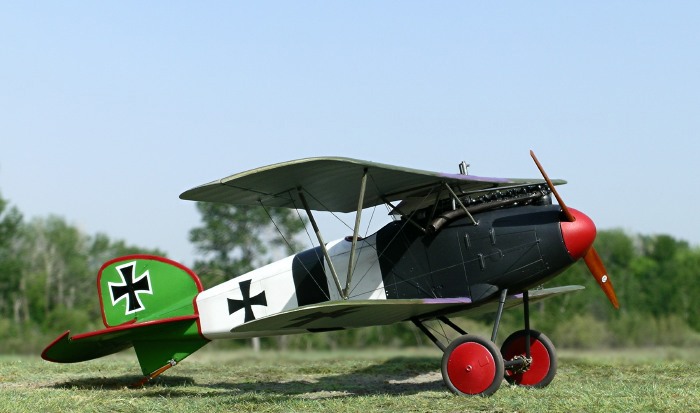
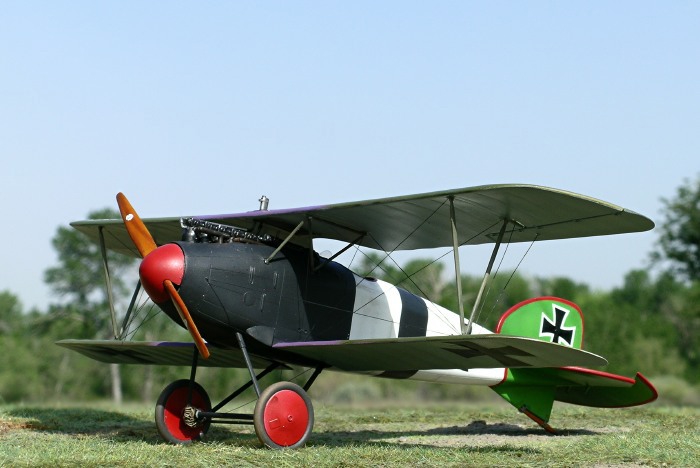
This is Roden’s 1/32 Albatros D.III in the markings of an aircraft
from Jasta 5. Not having much in the way of reference material for WWI
aircraft, I relied on a color profile in Squadron’s “Albatros Fighters
In Action” for the scheme. The book also proved useful in detailing.
Roden's 1/32 scale Albatros D.III
The Roden kit is molded in softer plastic than I am accustomed to,
and as such I found it a bit challenging to work with, particularly for
the finer pieces because of the large sprue attachments. After a number
of missteps in cutting, I opted to reproduce many of the finer pieces
from scratch.
Nevertheless, for a limited run kit the Roden Albatros is good
quality and makes for an enjoyable project. I’m looking forward to their
1/32 Albatros D. V.
Construction of the
Roden Albatros D.III is covered in a Hyperscale article by Chris Wauchop,
so I will simply describe some of the specifics of my model.
Details, Paint
and Decals
|
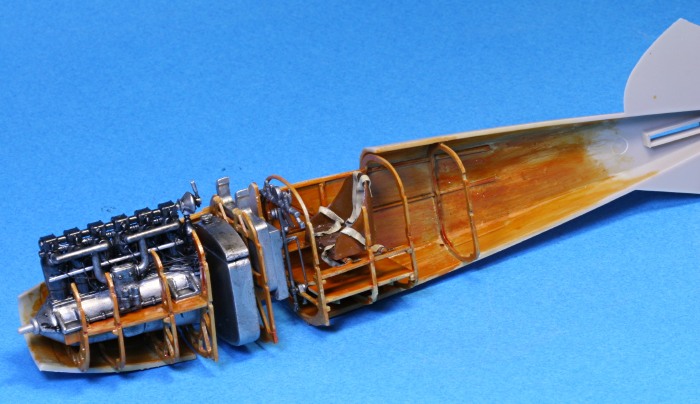
I painted the engine a combination Alclad II Aluminum and Tamiya
Gunmetal. Fine soldering wire was used to simulate the engine wiring.
The completed engine was carefully nested within the internal braces of
the forward fuselage.

Simulating wood grain within the fuselage was a two-step process.
First, I applied Tamiya’s XF-60 (Desert Yellow) with an airbrush. Once
dry, I hand painted Tamiya’s X-26 (Clear Orange) with broad brush
strokes over the Desert Yellow base. A similar technique was used on the
propeller, except that two base colors were needed to create the
laminated effect (desert yellow and desert yellow + red-brown).
 With
the fuselage halves together, I masked and painted the white, black, and
green surfaces. On the tail I used Polly Scale’s “Burl. No. Green” from
their line of railway colors. I then traced the shape of the tail
surfaces on paper, and used these as templates for cutting paint masks
from Tamiya tape. The masks were applied to the tail, leaving exposed a
thin trim line around the edges. I sprayed light gray over the trim,
followed by Tamiya X-7 (red) - the red paint would not cover well if
applied directly over the green. The same color red was used on the
wheel hubs and spinner. With
the fuselage halves together, I masked and painted the white, black, and
green surfaces. On the tail I used Polly Scale’s “Burl. No. Green” from
their line of railway colors. I then traced the shape of the tail
surfaces on paper, and used these as templates for cutting paint masks
from Tamiya tape. The masks were applied to the tail, leaving exposed a
thin trim line around the edges. I sprayed light gray over the trim,
followed by Tamiya X-7 (red) - the red paint would not cover well if
applied directly over the green. The same color red was used on the
wheel hubs and spinner.
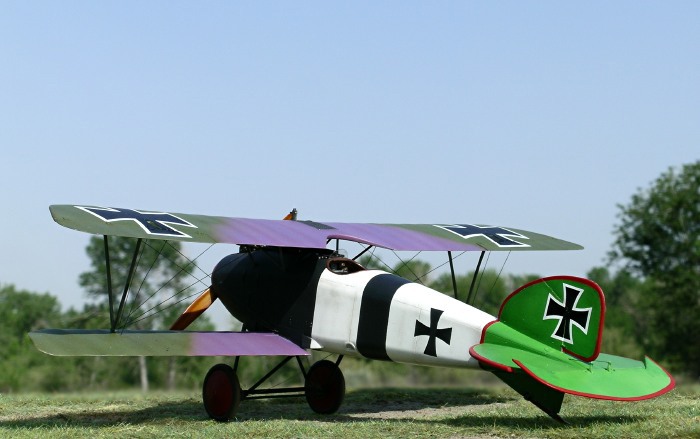
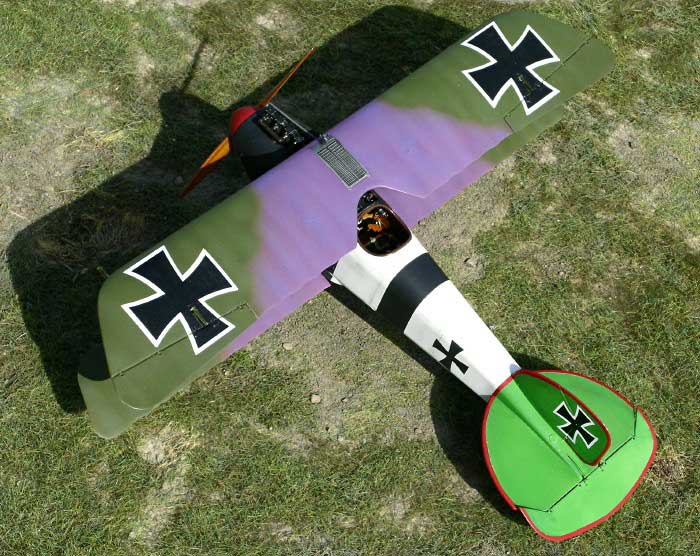
The wings were painted in RAF green with a touch of RLM 67 (Dark Olive),
and a custom mixture of mauve (using Polly Scale German Mauve, RLM 23
Red, and ATSF Blue). The undersides of the wings were painted Polly
Scale RLM 65.
Decals on the model were limited. I used EagleCals sheet #93 for the
tail crosses, and the kit decals for the wing crosses. The fuselage
cross was masked and sprayed on.
Fishing line was used for the rigging; however, the stuff I used
(Berkley Fireline) sags in the cold. I completed my model over the
winter but had to wait until summer to take pictures because the rigging
sagged noticeably outdoors when temperatures were low. I will use
something else next time.
Groundwork
A wooden cutting board was used as the base for the model. Celluclay
was used to make the basic ground cover. The celluclay powder was mixed
into a paste with water and white glue, tinted with brown acrylic paint,
and then spread thinly over the cutting board. Note that the cutting
board had previously been treated with several coats of clear lacquer to
prevent warping while the celluclay dried.
While the celluclay was still wet I added pieces of Heki grass mat
(item # 1574 - Wild Grass Savanna), fine sand, and small bits of moss.
Heki products are available for purchase in the United States from
“Scenic Express”.
Images were taken with a Nikon Coolpix 5400 digital camera. The
“sharpen edges” tool of Adobe Photoshop was used to restore some of the
clarity and crispness lost during image compression.
The “blur” tool was used to help merge the base with the natural
background.
Click on the thumbnails
below to view larger images:
[../../photogallery/photo00016121/real.htm]
Model, Images and
Text Copyright © 2007 by Ian Robertson
Page Created 28 June, 2007
Last Updated 24 December, 2007
Back to HyperScale
Main Page
|
 Home
| What's New |
Features |
Gallery |
Reviews |
Reference |
Forum |
Home
| What's New |
Features |
Gallery |
Reviews |
Reference |
Forum |